Blackboard: Deploy a Test/Pool/Survey
You can use tests to measure student knowledge, gauge progress, and gather information from students. You assign points to test questions for grading evaluation.
How to Deploy a Test
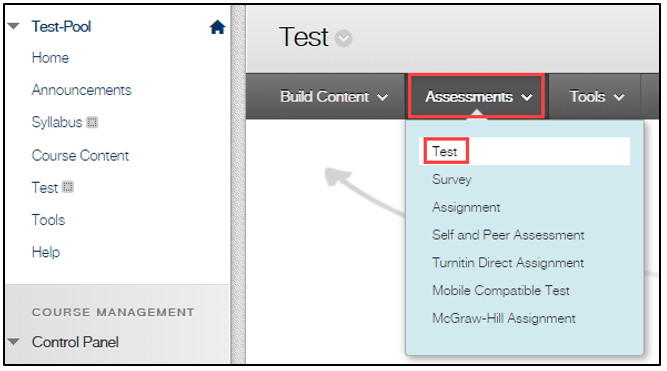
- Go into the content area to which you would like to add the test. Then click Assessments, and Test.
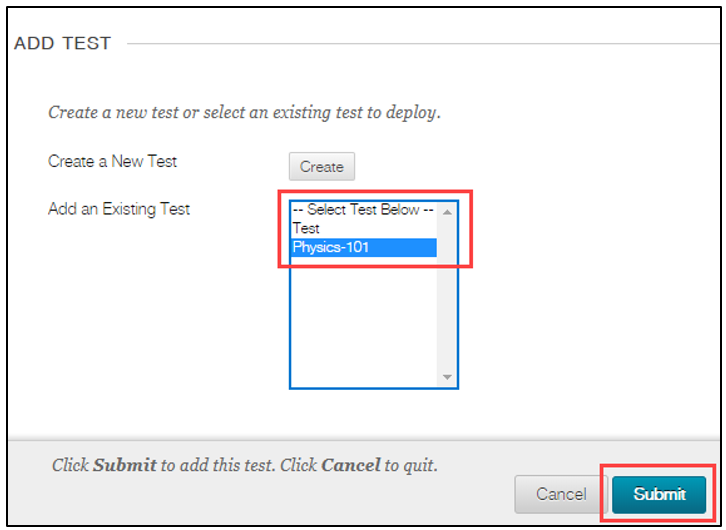
- Select the test that you would like to add in the content area. Then click Submit.
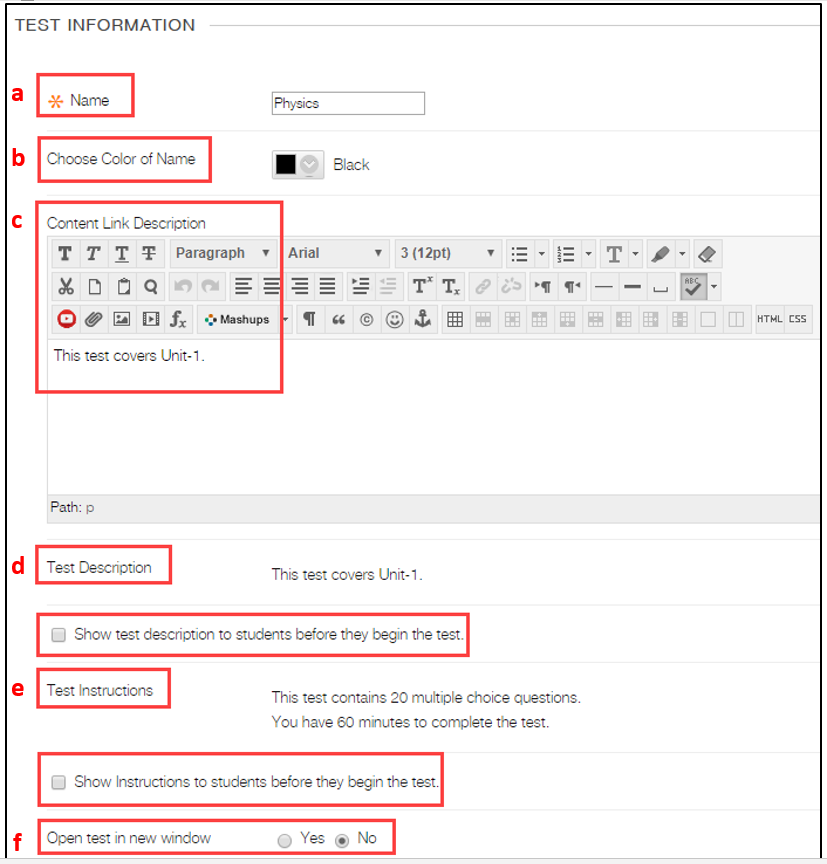
- After submitting the test, the Test Option screen appears. The first title is Test Information.
- Name: Rename the test if you wish.
- Choose Color of Name: Change the color of the test using color selector.
- Content Link Description: Type or change the description of the test in the text box.
- Test Description: This was created when you first created the test. If the test description was not created, it won’t appear. Click Show test description to students before they begin the test to make it visible to students before starting the test.
- Test Instructions: These were created when you first created the test questions. If the test instructions were not created, they won’t appear. Click Show instructions to students before they begin the test to make them visible to students before starting the test.
- Open test in new window: Click Yes to open the test in a new window or click No to open the test in the same window.
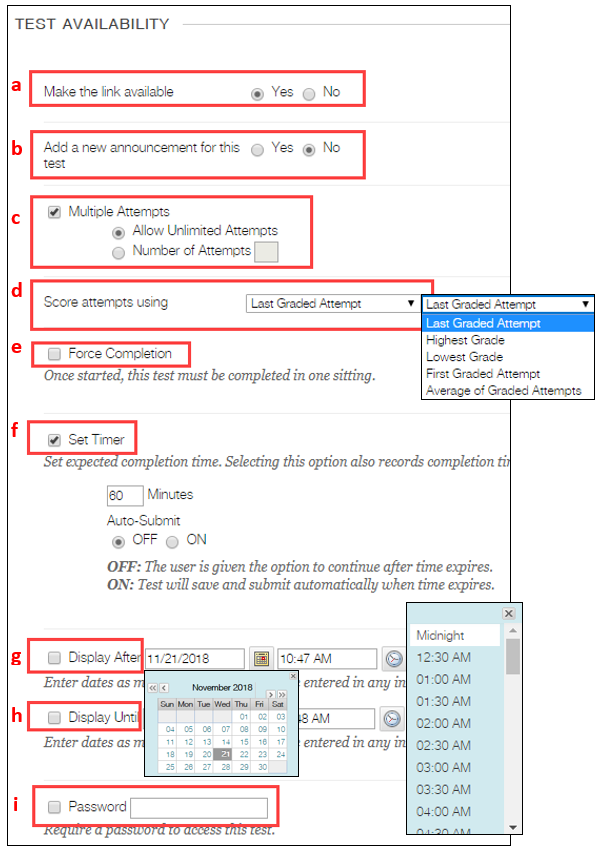
- The second title is Test Availability.
a. Make the link available: Click Yes to make the test visible to students. If you select No, students cannot see the test even if the test availability dates are specified.
b. Add a new announcement for this test: Click Yes to automatically send a message that the test has been posted.
c. Multiple Attempts: Check the box to allow students to make multiple attempts on the test. Then select either Allow Unlimited Attempts or Number of Attempts and type the number of attempts allowed. If you want to allow a single attempt, do not check the box.
d. Score attempts using: If you select multiple attempts or unlimited attempts, select how to grade the attempts using dropdown menu.
e. Force Completion: Click this option to prevent students from reentering the test if they exit the test without submitting.
f. Set Timer: Check the box to set a time for the test and type the duration in minutes.
Auto-Submit On: The test will automatically be submitted after the time ends.
Auto-Submit Off: Students can continue after the time ends. However, the completion time is noted in the grade center.
Note: The force completion option is not recommended, because if a technical difficulty occurs (such as accidentally closing the browser window or losing Internet connection), students need to reenter the test. Instead, we recommended instructors use the set timer to ensure submission of the test.
g. Display After: Check the box and use the date and time selector to specify the date when the test become available to students.
h. Display Until: Check the box and use the date and time selector to specify the date when the test is no longer available to students.
i. Password: Check the box and type a password which will be distributed to students before the test. The password has a limit of 15 characters and is case sensitive. This option may be used if students take the test in a classroom.
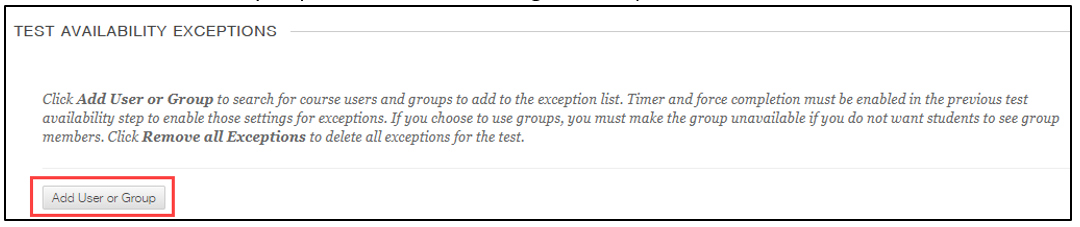
- The third title is Test Availability Exceptions.
a. Click Add User or Group to search for course users and groups to add to the exception list. Timer and force completion must be enabled in the previous test availability step to enable those settings for exceptions.
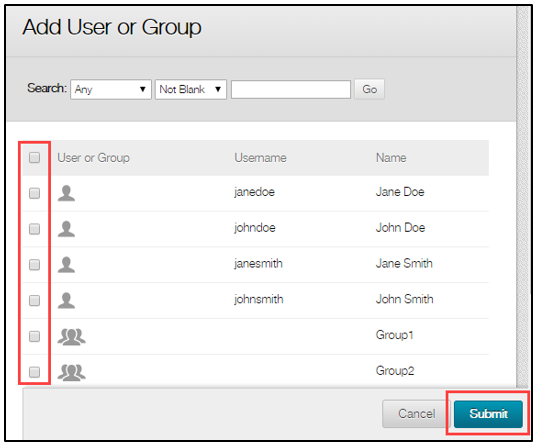
b. Check the box/es next to the students’ or groups’ name to add them to the exception list and click Submit.
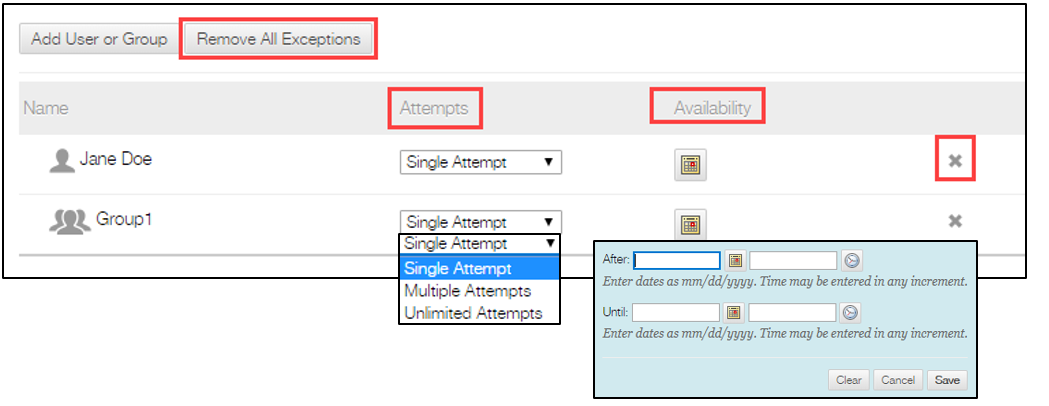
c. Click Remove all Exceptions to delete all exceptions for the test or click the X icon to remove the specific exception. You can specify Attempts and Availability
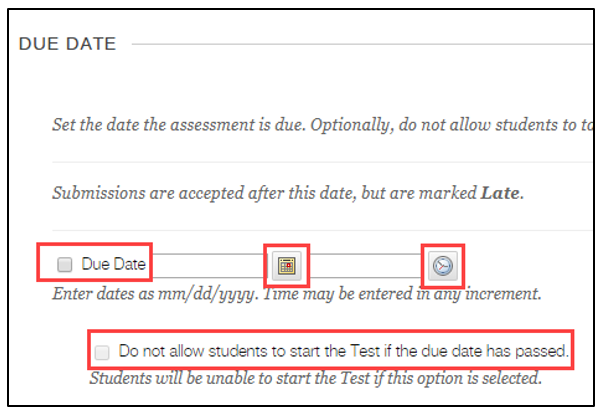
- The fourth title is Due Date. Set the due date of the test by using the date and time selector. Optionally, you can click Do not allow students to start the test if the due date has passed.
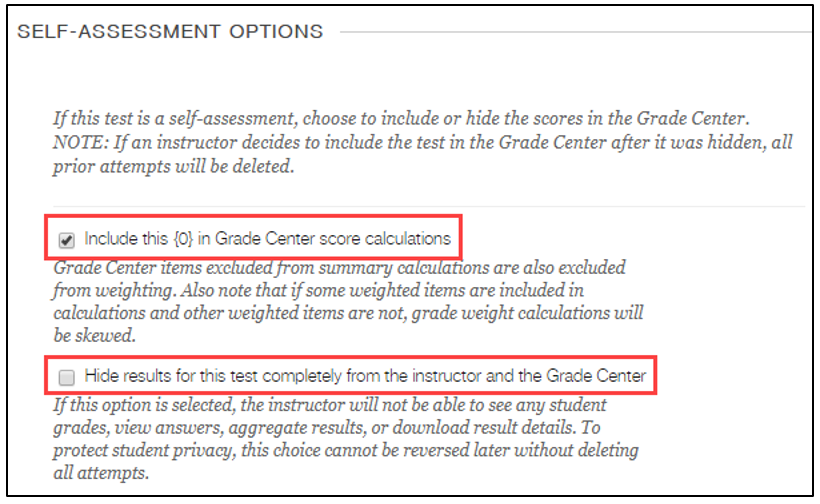
- The fifth title is Self-assessment Options. A test is included in grade center calculations by default. However, you can turn the test into a self-assessment without impacting grade center calculations so that students can take it as review or practice without feeling score pressure. If you choose Hide results for the test completely from instructor and the grade center, the scores are not included in grade center calculations. However, students can see their own scores.
Note: If you decide to include the test in the grade center after it was hidden, all prior attempts will be deleted.
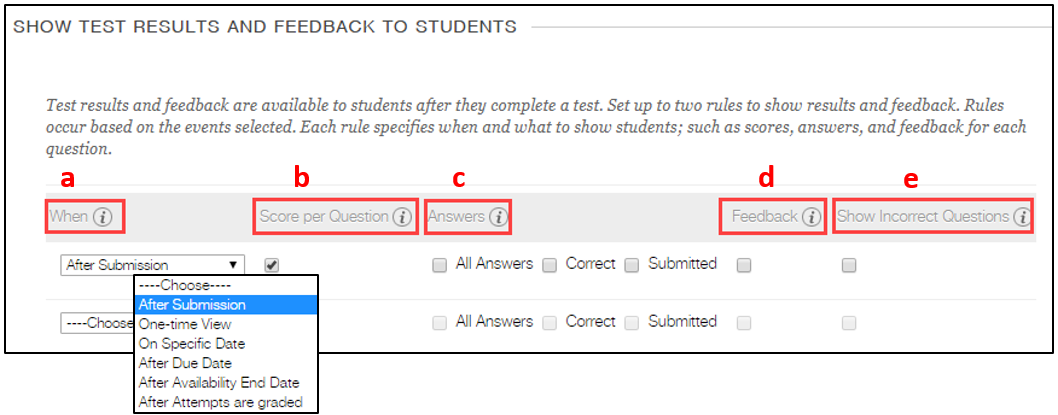
- The sixth title is Show Test Results and Feedback to Students. You can select which results and feedback are shown to students after the test is completed. You can set one or two rules using the menu items. However, after you select a rule in the first dropdown menu, some of the options may not appear in the second dropdown menu.
a. When: Select an option from the dropdown menu to specify when students can view the answers and feedback.
After Submission: This is the default option. Students can see answers/feedback right after they submit the test.
One-time View: After students complete the test, they can see the answers/feedback once.
On Specific Date: Students can see the answers/feedback after the selected date and time.
After Availability End Date: Students can see the answers/feedback after the test availability date ends.
After Attempts are graded: Students can see the answers/feedback after all students’ submissions are graded.
b. Score per Question: Check this option to allow students to view the score earned for each question.
c. Answers: Check the appropriate options to determine whether students can see all answer choices, the correct ones, or the ones that students submitted.
d. Feedback: Check this option to allow students to view question-specific feedback that you type while creating the question.
e. Show Incorrect Questions: Check this option to allow students to see which question/s they marked incorrect.
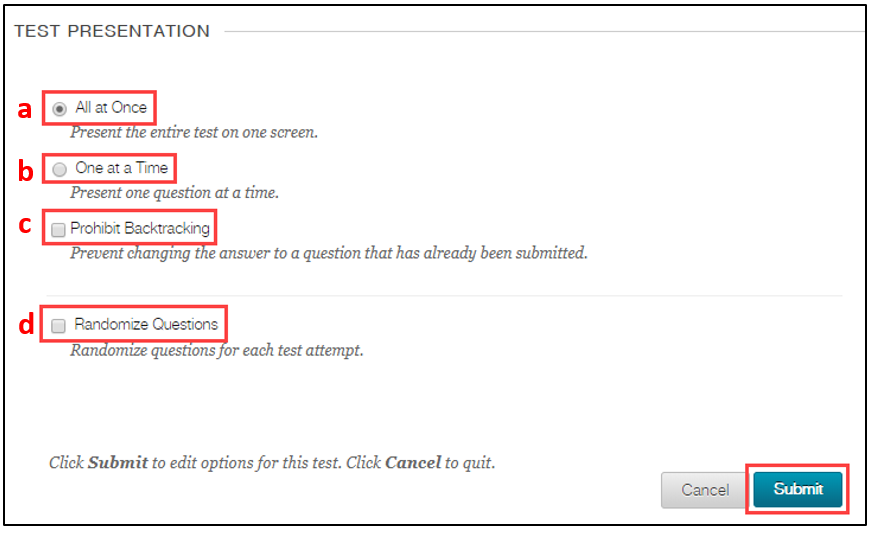
- The final title is Test Presentation. In this part, choose how the test is presented to students.
a. All at Once: Choose this option to present all of questions on one screen.
b. One at a Time: Choose this option to display one question at a time. The screen includes navigation tools to move between questions.
c. Prohibit Backtracking: Choose this option to prevent students from going back to previous questions they have already answered.
d. Randomize Questions: Choose this option to display the questions randomly for each attempt.
After specifying all of the test options, click Submit.