1. Koç University SAP System
Koç University SAP System includes the following modules:
-
Accounting
-
Budget Control
-
Asset Management
-
Purchase
-
Human Resources
-
Project System and projects
1.1. Initial Operations
To start using the SAP System, you must obtain a user account.
Follow the steps below for user account requests:
It is necessary to send an email to the it@ku.edu.tr e-mail address with the approval of your department manager, indicating the roles that need to be defined, or an example user working in the department with the same roles. After this process, a claim will be created on your behalf. Then, your account information will be created and the necessary information will be sent by email.
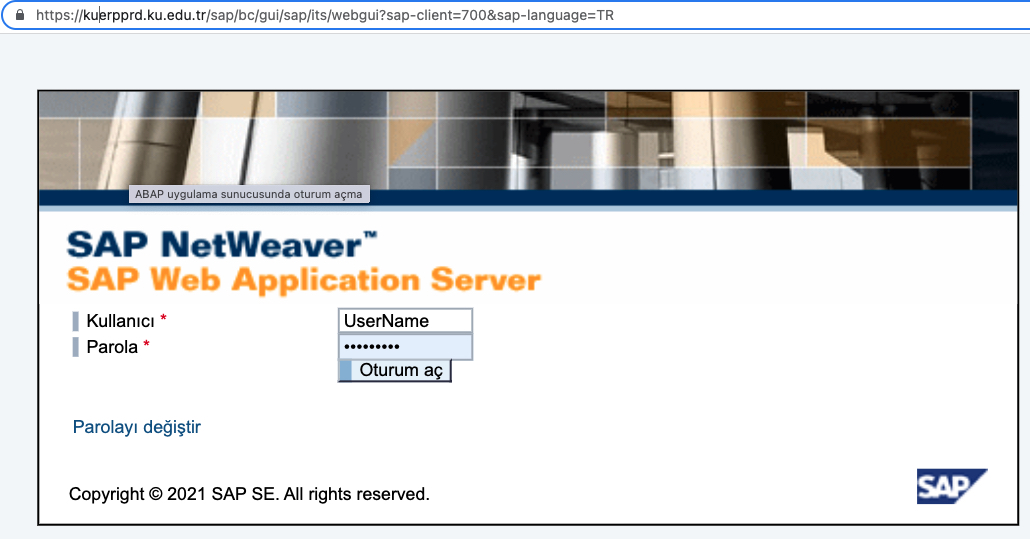
WEB GUI allows you to access the Koç University SAP system via the web without needing to install any programs on your computer. You need to access the WEB GUI via Mozilla Firefox.
1.2. Introduction to the SAP
You can log in to the SAP system by running the GUI Program installed on your computer or by using a WEB GUI connection.
Double-click the SAP LOGON shortcut button on your desktop to run the GUI Program (Windows | macOS) installed on your computer. You can request for SAP Logon program installation by sending an e-mail to it@ku.edu.tr. In the window that opens, double-click the previously created server connection. If you cannot see the server connection link in the window that opens, you can get help from the Service Desk by sending an e-mail to it@ku.edu.tr.
If the GUI Program is not installed on your computer, you can access the SAP system with the WEB GUI connection. If you are providing internet access over a network outside the University, you must provide a VPN connection from the link https://vpn.ku.edu.tr. Click the link for help creating a VPN connection.
If you are connecting to the system for the first time, you must change your temporary password to your permanent password.
The password that is given to you when you get a new user account is temporary. After logging in with the temporary password, the system automatically opens the screen to change the password.
In the new password field, you should write the permanent password that you will create for yourself, and retype this password on the bottom line.
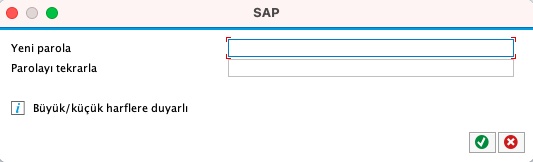
Your password must comply with the following rules:
-
Must be at least 8 characters
-
Must contain at least 1 uppercase and 1 lowercase letter
-
Must contain at least 1 special character ( “ .,!’^+%&/()=?_- )
For your password problems, you can get help from the IT Service Desk by sending an email to it@ku.edu.tr.
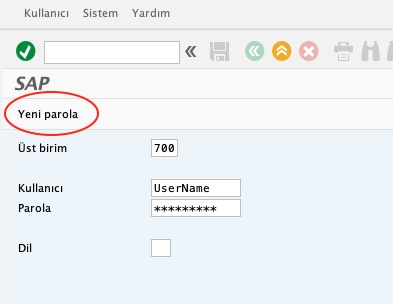
To change your current password, you must enter your username and password, click the new password button, and then type the permanent password that you will create for yourself in the new password field from the window that opens and retype this password on the bottom line.

1.3. SAP User Screen
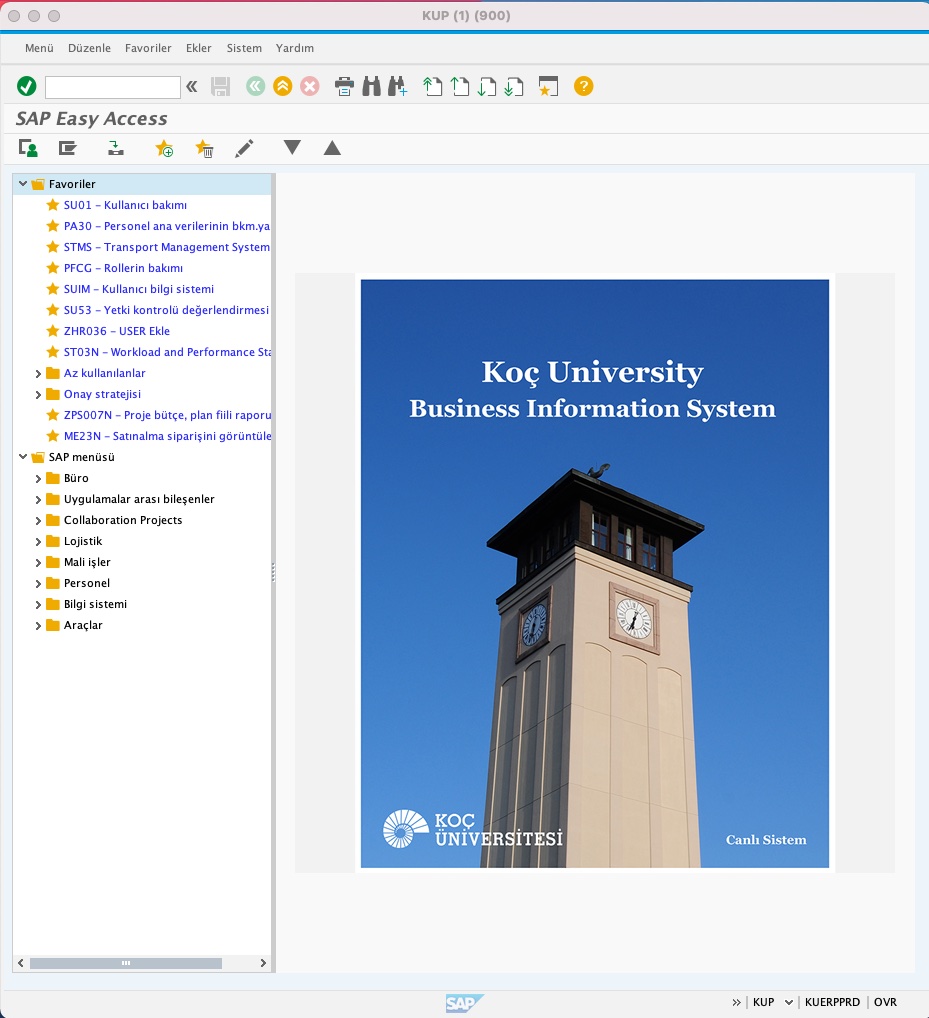
The SAP User Screen is the main SAP screen where you can view the transactions defined in your account, access these transactions, and enter data. When the user screen is opened for the first time, the operations defined in line with your authorization are displayed under the user menu. You can customize your user screen by creating a favorite menu and adjusting some screen settings.
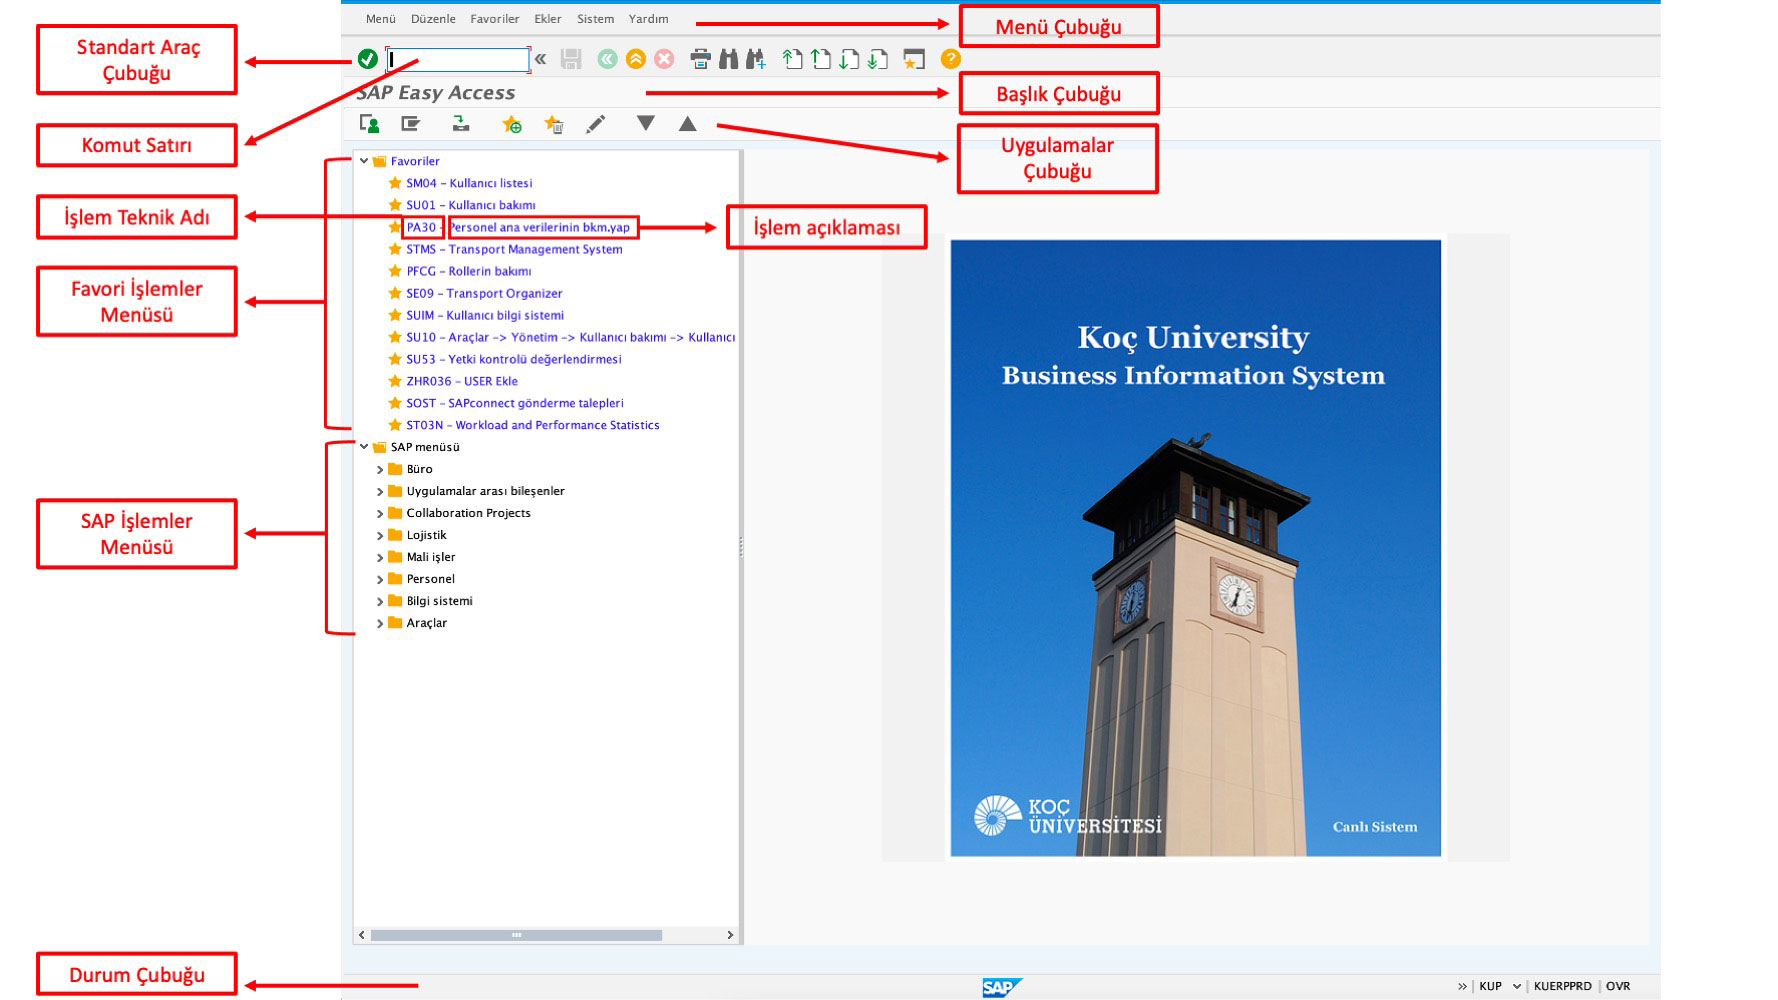
1.4. SAP Opening Screen
-
Menu Bar: Contains system commands. The operations of minimizing, hiding, enlarging, adjusting the size and closing the SAP window are performed.
-
Standard Toolbar: Contains tools for managing common functions related to the active screen or task. Processes with known technical names are run with the command line. Searching, switching between screens, creating a new work screen, help, exiting the active process and local settings are done.
-
Title Bar: Contains title information about the current screen. For example, when the purchase requisition creation screen is active, the title "create purchase requisition" appears in the title bar.
-
Applications Bar: Contains shortcut buttons to access applications in the system.
-
Operation Menus: There are three separate operation menus. The first is the Favorite Transactions Menu, where you can create your own unique transaction menu by selecting your favorite transactions. Click for help creating your favorite menu. The second menu is the SAP Menu. This menu contains standard SAP operations. The third menu is the user menu. In this menu, there are actions that the user can perform within the framework of defined authorizations and roles.
-
Status Bar: It is the area where system-related messages, system GUIdance, and instructions and error messages are displayed. The KUP (1) 700 message that appears in the right-hand field contains the information that 1 session is open and that you are connected to the 700 servers. If you press the button, you can access detailed information about the session.
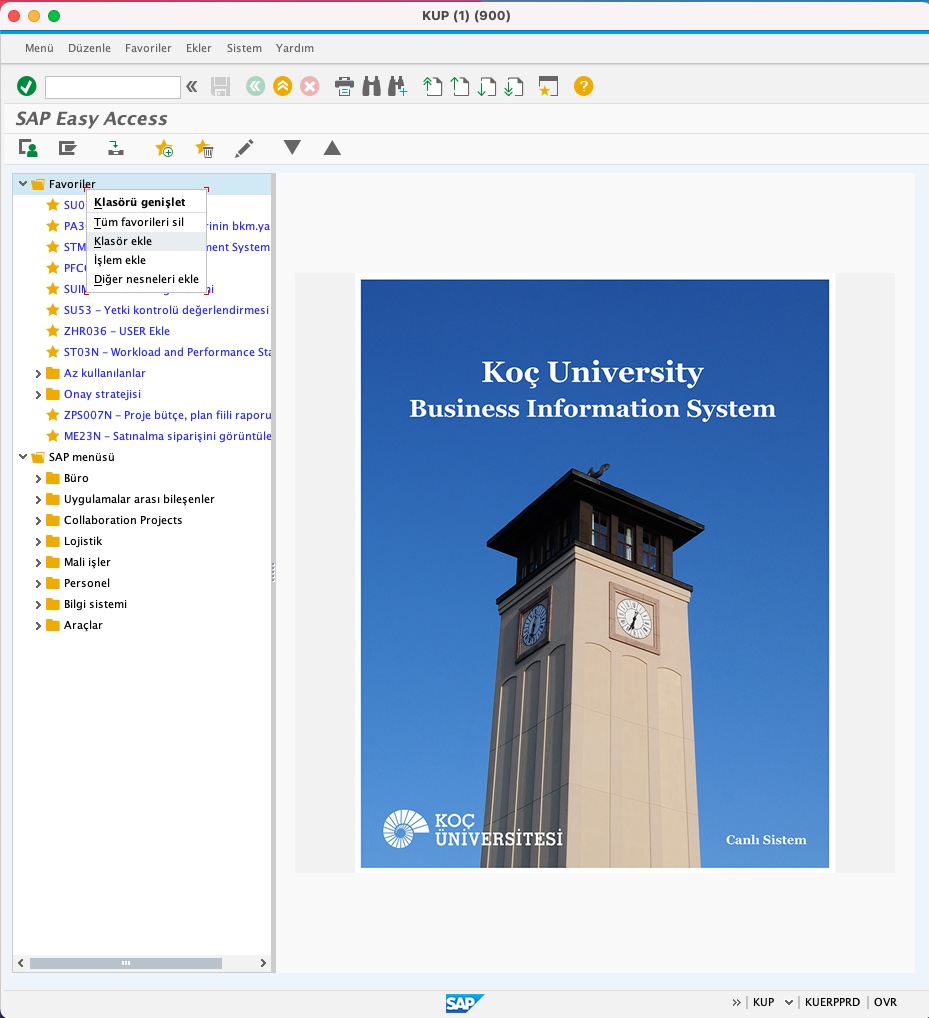
1.5. Favorite Operations Menu
You can customize your favorite menu the way you want by creating new folders. You can create subfolders by right-clicking on the favorite folder and selecting 'Add Folder.' You can move the operations you want into these created subfolders or directly into the favorites folder.
When the Add folder line is selected, a new screen will open. Type the folder name you want to view on this screen and press enter or click the Description automatically generated button. The relevant folder will be created in your favorite menu. You can create folders according to your operation types and needs.

Follow the steps below to add processes to these folders you have created. First of all, change the SAP Menu to the user menu as shown below. Thus, the transactions you can perform in the SAP system within the framework of your authorization and roles will be listed under the favorite menu.

From your user menu, you can drag the desired operation to the folder you created by holding down the left mouse button.
The second method of adding processes to the folders you have created is as seen below is to select the Add action line by pressing the right mouse button while on the relevant folder.

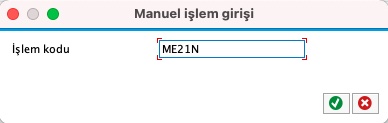
When the Add action line is selected, the Error! The reference source is not found screen will open. On this screen, you need to enter the technical name of the transaction you want to add. Enter or click the Description automatically generated button. The process will be added to the corresponding folder.
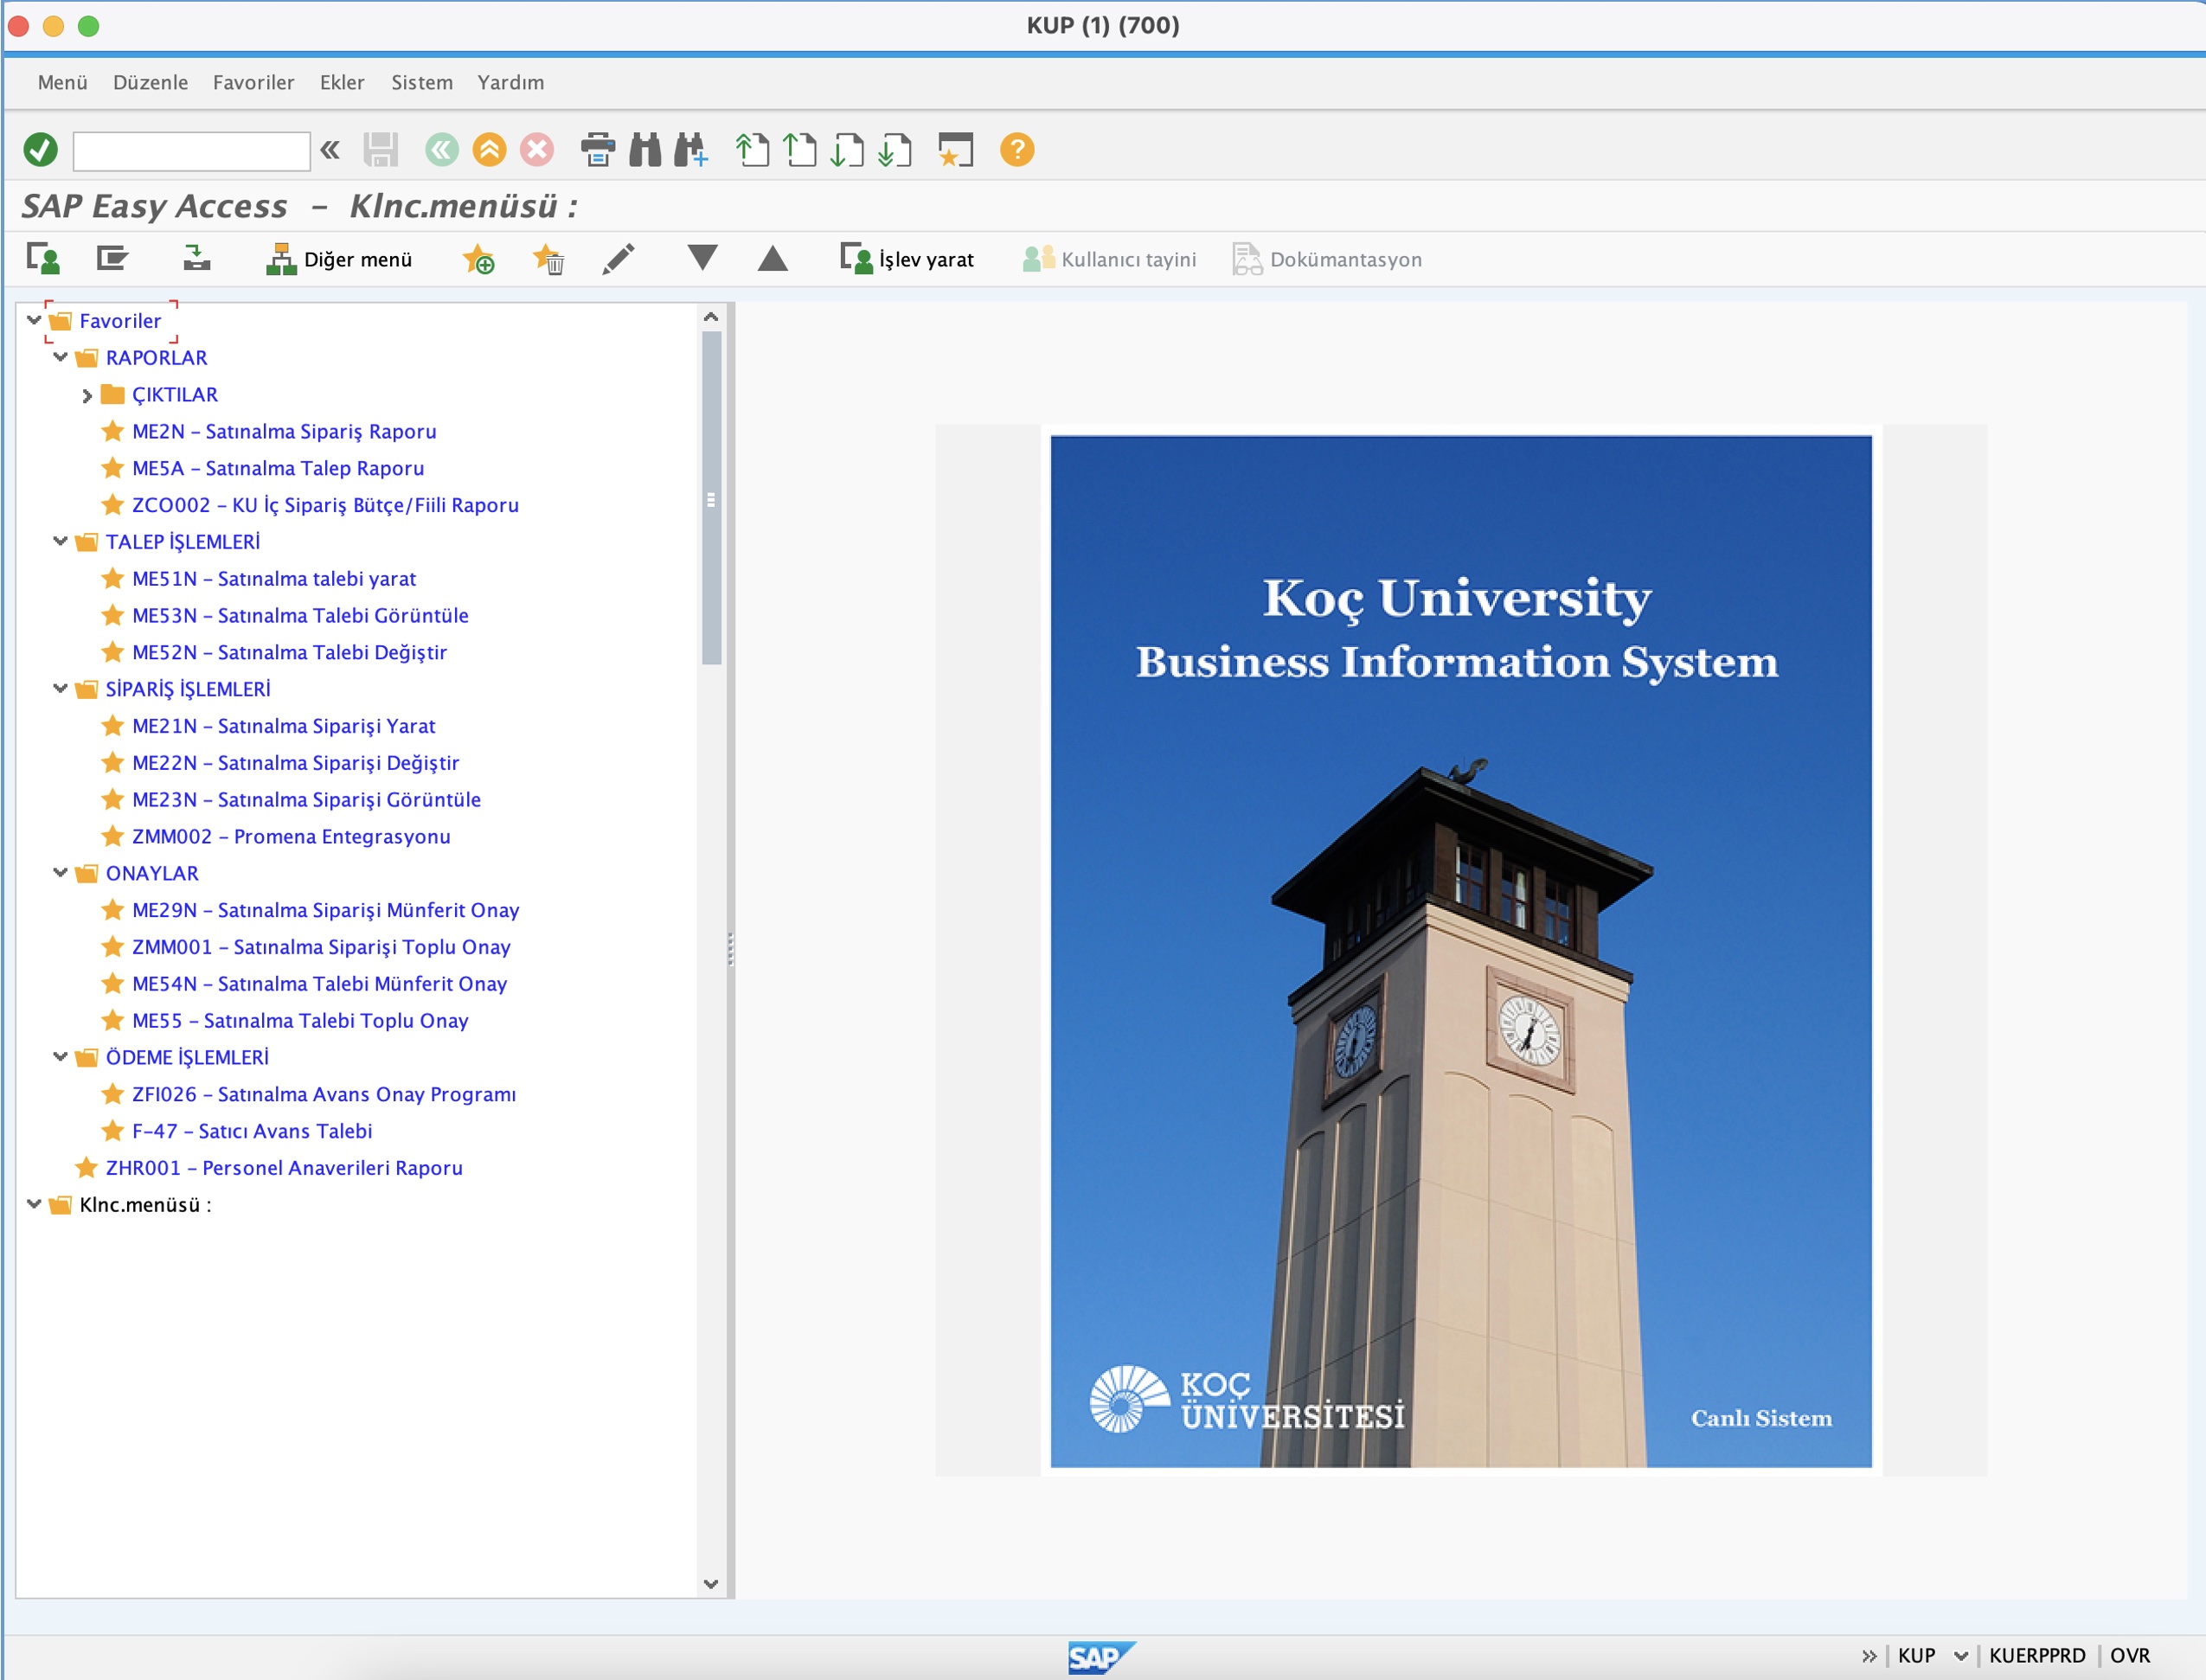
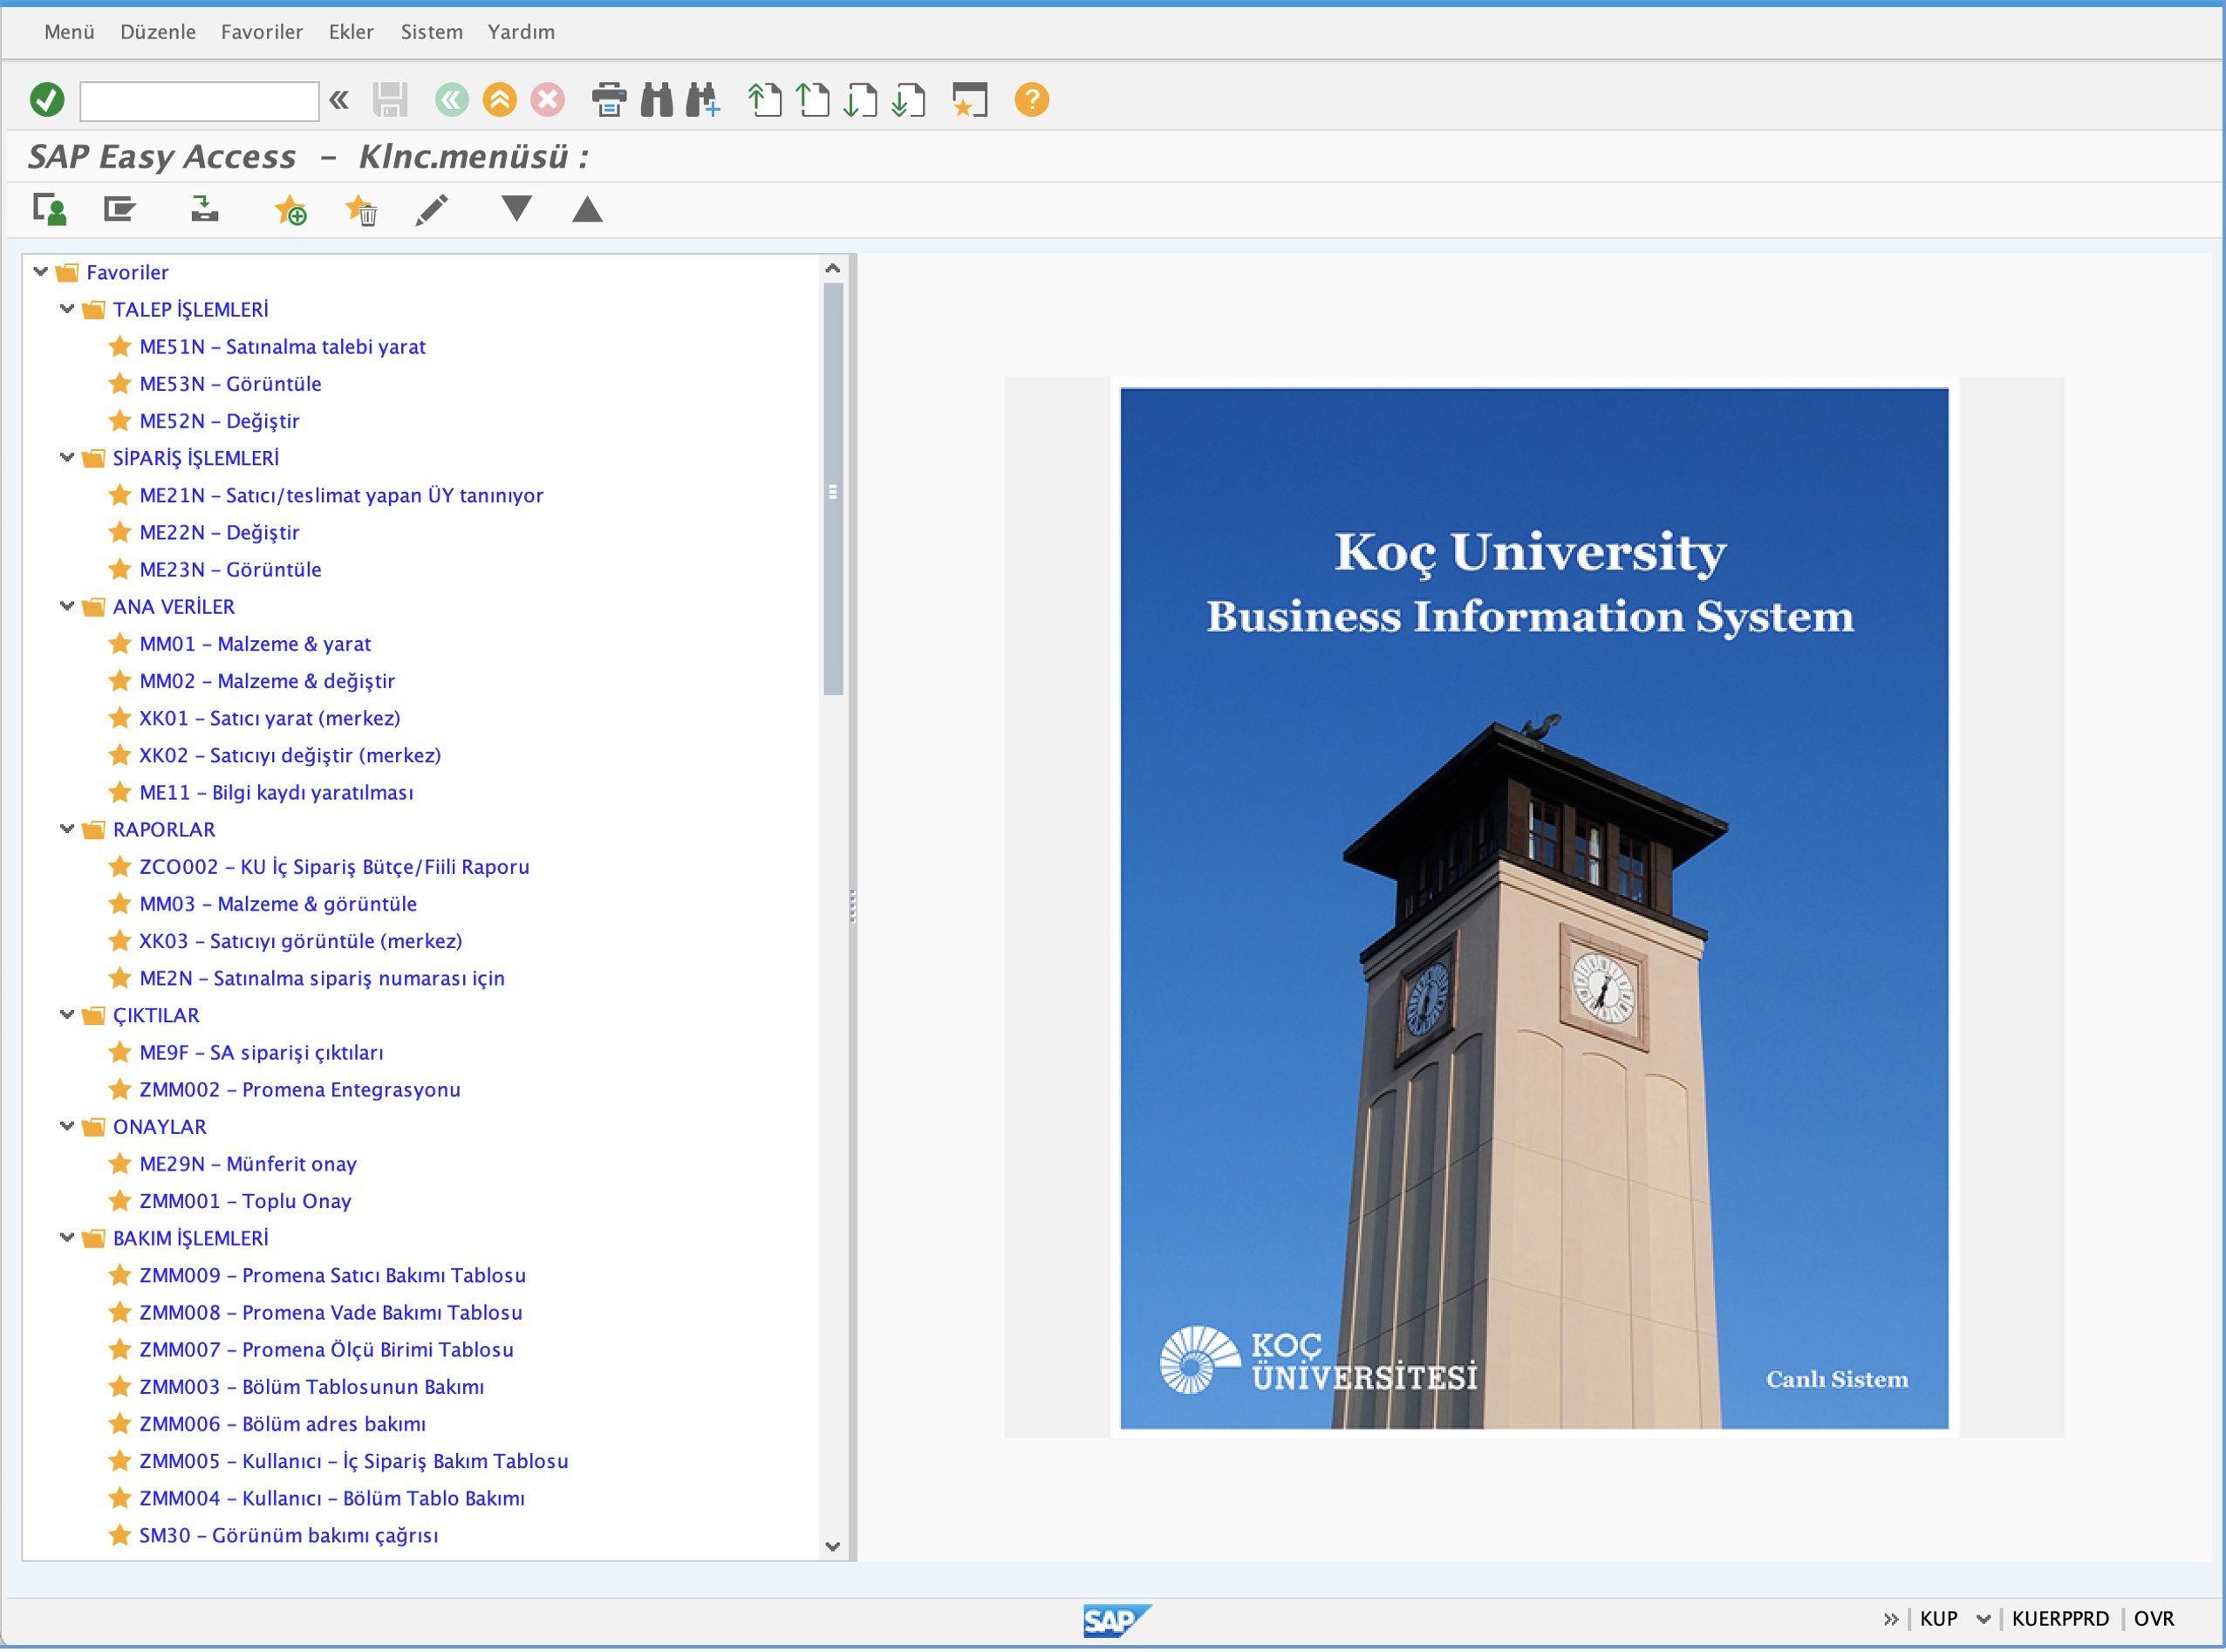
1.6. Operations on the Standard Favorite Menu
There are five main folders in the Standard Favorite Menu as seen below.
-
Reports: There are order, demand and budget reports for the end-user.
-
Outputs: There is the process where the order and expense form printouts are taken.
-
Demand Operations: Demand creation, viewing and modification operations are included.
-
Order Operations: Includes order creation, viewing and modification.
-
Approvals: Includes order and request documents, individual and batch approvals.
Payment Transactions:
-
Demand Operations: Demand creation, viewing and modification operations are included.
-
Order Operations: Includes order creation, viewing and modification.
-
Main Data:
-
Reports: There are order, demand and budget reports for the end-user.
-
Outputs: There is the process where the order and expense form printouts are taken.
-
Approvals: Includes order and request documents, individual and batch approvals.
-
Maintenance Operations:
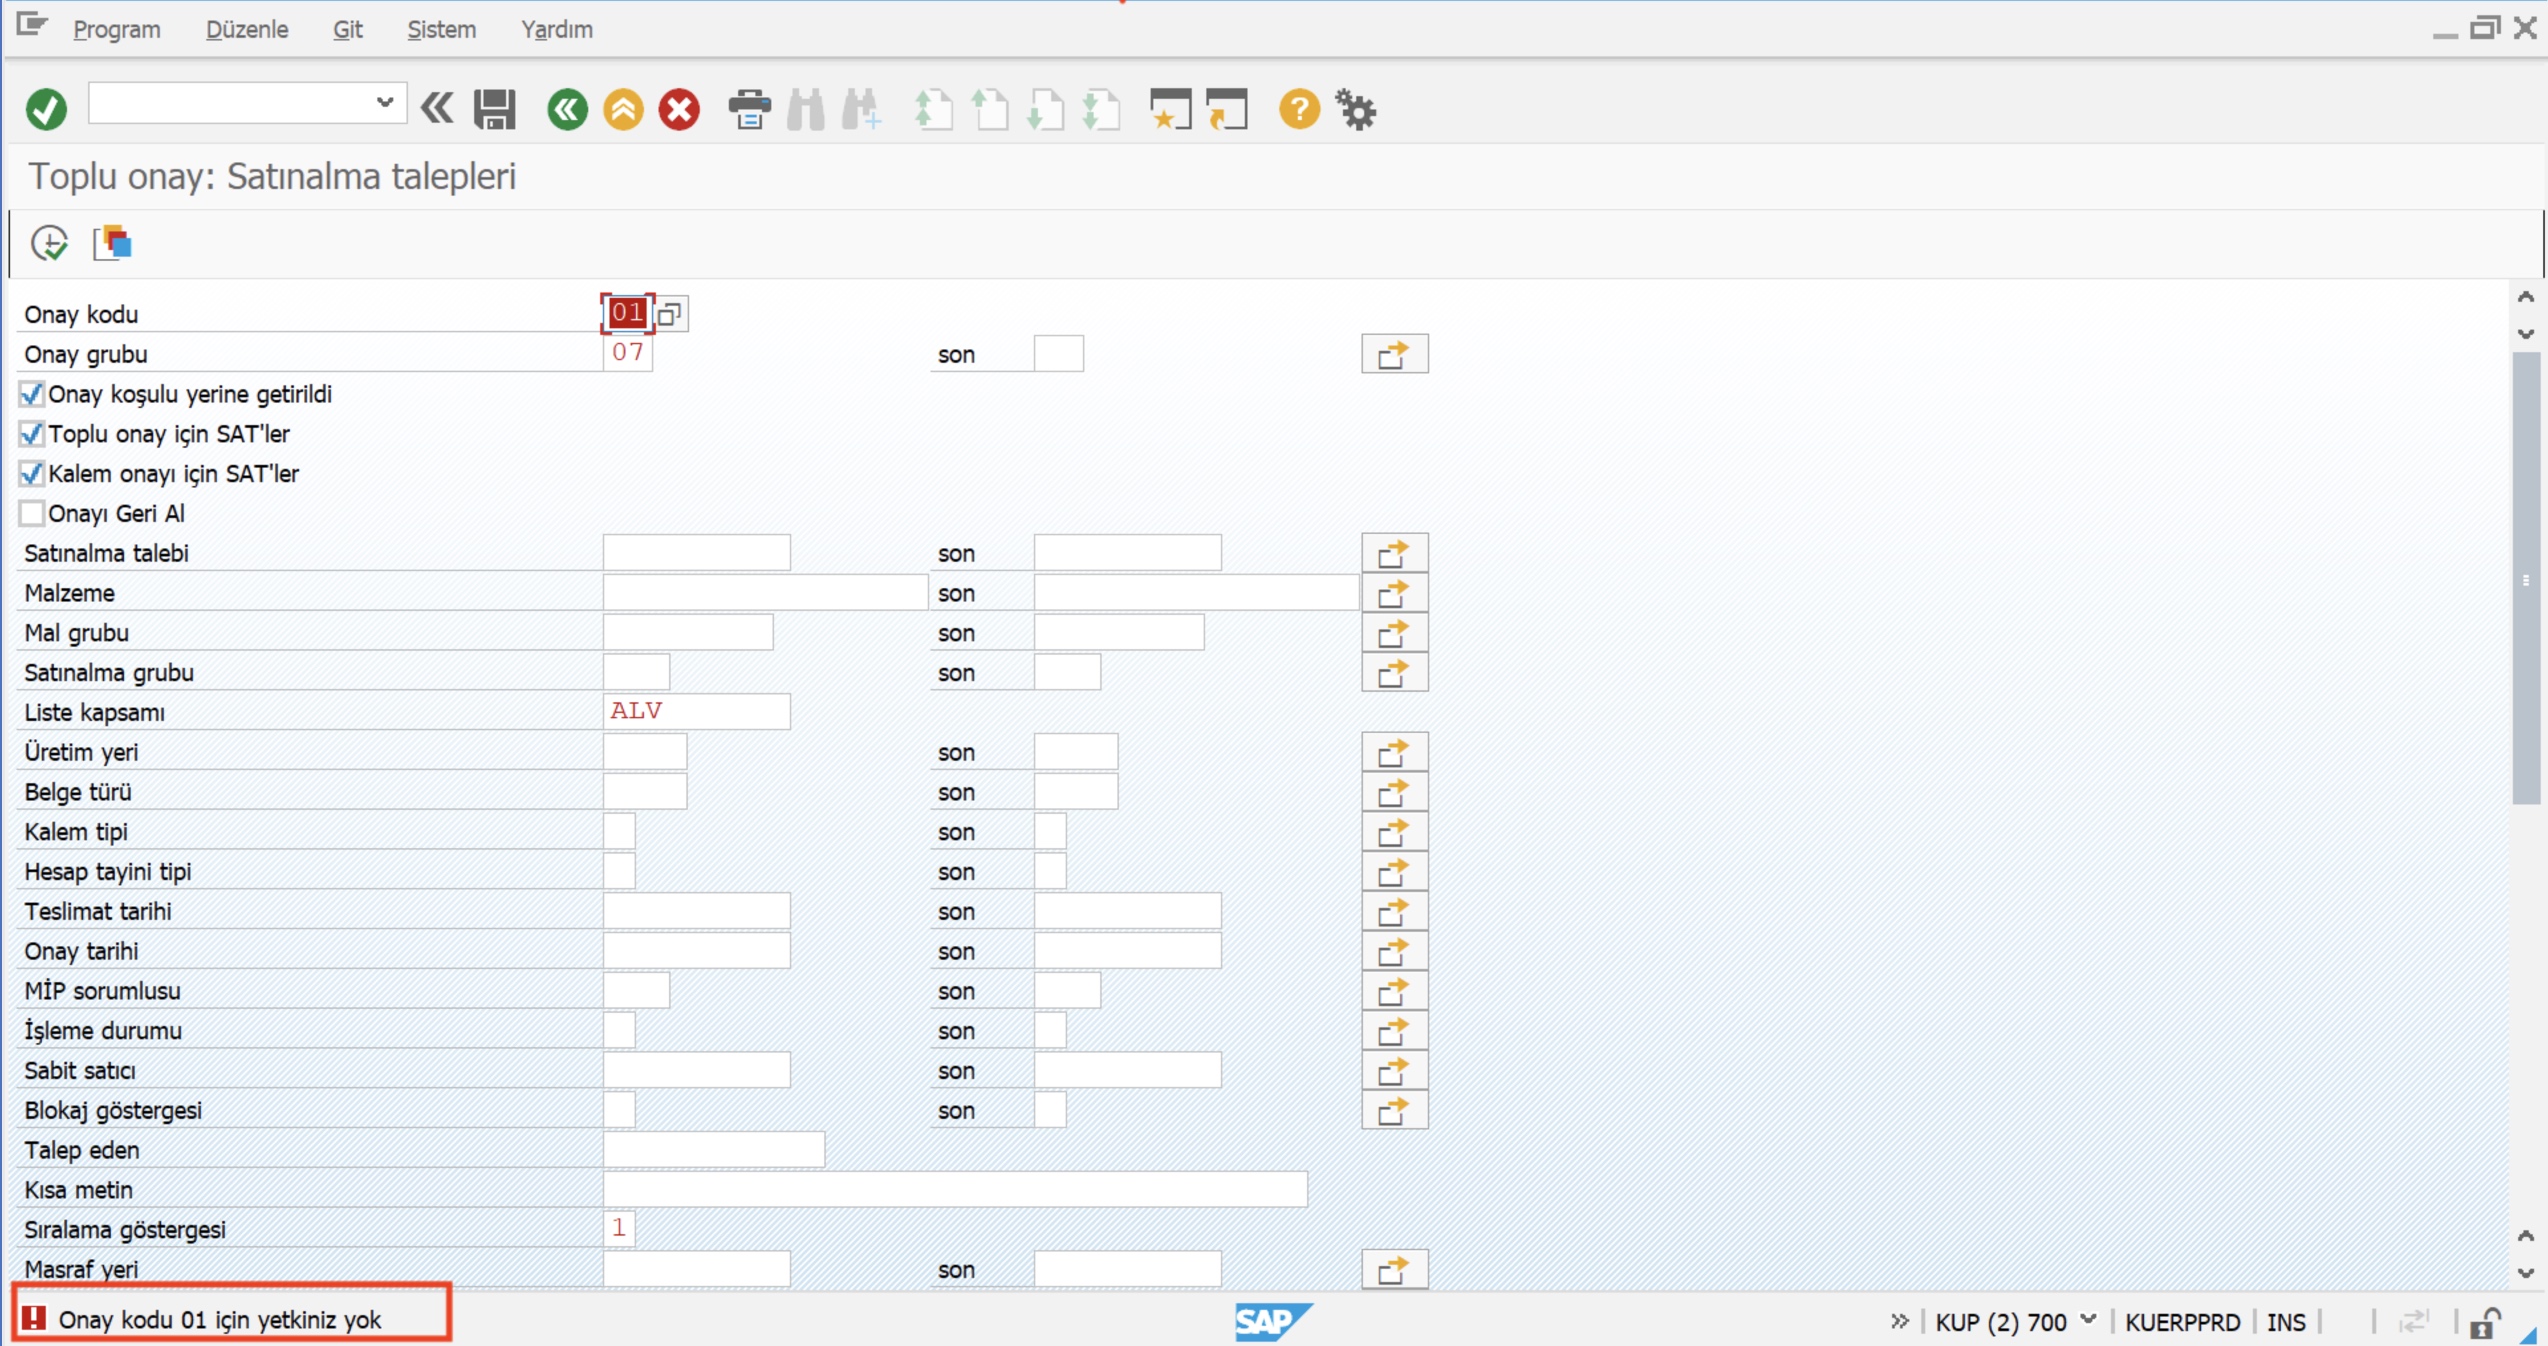
1.7. Lack of Authority Regarding Transactions
If you are not authorized to perform a transaction that you want to log in to the SAP system, an error message will appear in the lower-left part of the status bar as shown below, stating that you are not authorized for the transaction.
When you get an authorization error, type su53 on the command line and press enter. Take a screenshot as seen in the example below.
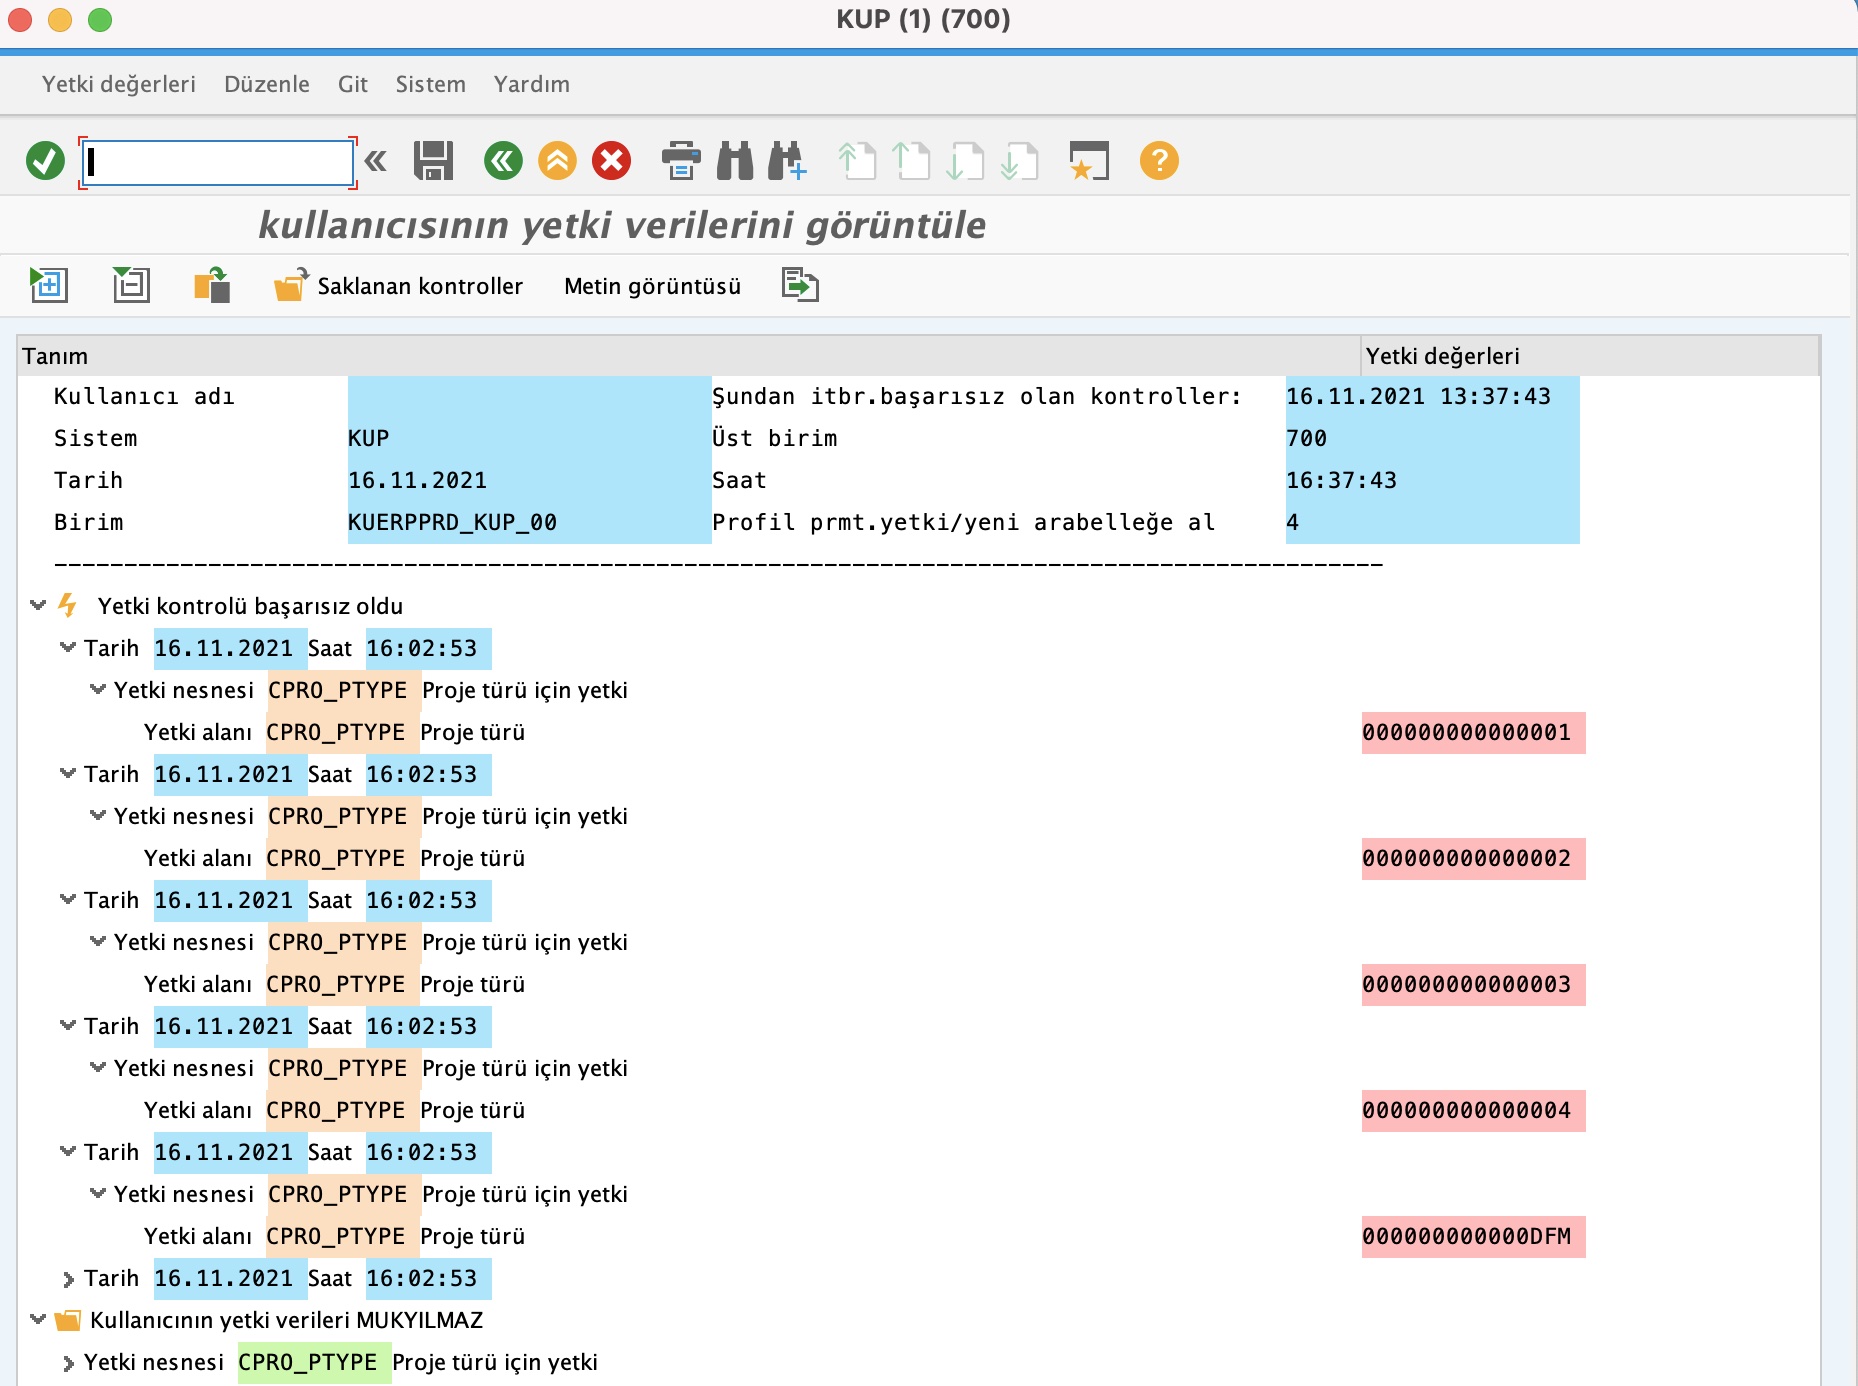
For authorization errors or deficiencies, please indicate to it@ku.edu.tr with a screenshot during which transaction you received an authorization error. (In Example: CJI3 Transaction)
Your authorization requests will be evaluated within the scope of your job description and SAP user role, and appropriate authorizations will be assigned to your account. You will be notified by e-mail of the developments regarding your request.
2. Transactions and Activities
Purchasing processes begin with the creation of the requested document in the system. A Procurement Request Document must be created for the Purchasing Unit to determine prices and suppliers and to carry out transactions in accordance with Koç University Purchasing Regulation. Purchases made before the requested document is created are considered departmental expenditure, outside the responsibility of the Purchasing Department. However, when the demand document is opened, the buyer responsible for the relevant purchase is appointed. Purchasing requests are created through ITA (Needs Request Platform), the user guide is available at the link.
Requisition documents cannot be created for non-purchasing department expenditures. In this case, the department directly performing the transaction creates an order document (SAS) under its own responsibility.
Purchasing requisition documents are followed in four main document types according to order document approval strategies and transaction types. You can find detailed descriptions of these types below.
Requirements to Creating Direct SAS in SAP:
-
Having a SAP User
-
Existence of the authorizations of your department
-
Defining the budgets you will use
Your ITP codes must be defined to the department when creating SAS
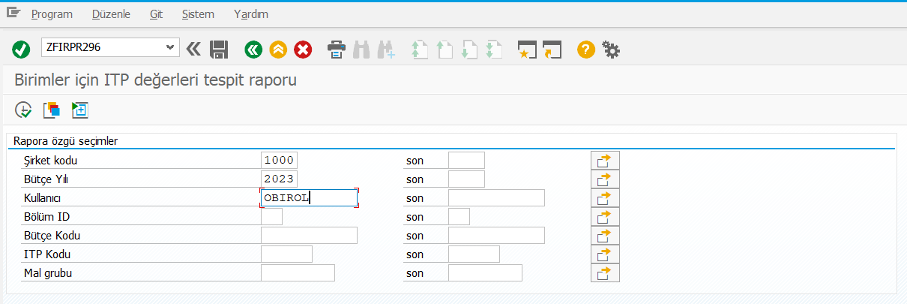
ITP Detection (ITP is not required for ZPAL project purchases)
It is necessary to determine which ITP to spend from the ZFIRPR296 transaction code. The filter field that appears.
-
Company Code: Koç University 1000, Unvest 2000 or Economic Enterprise 1100
-
Budget Year: Budget Year (2023)
-
User: The username you log into SAP (OBIROL)
In the SAS to be created, it is determined which ITP will be used in the resulting list:
-
Goods group
•Section
-
Budget Code
-
ITP
It must be created in harmony with the fields.
Create SAS Screen:
To create the SAS, you need to write the transaction code ME21N in the transaction code field and the following information is filled in.
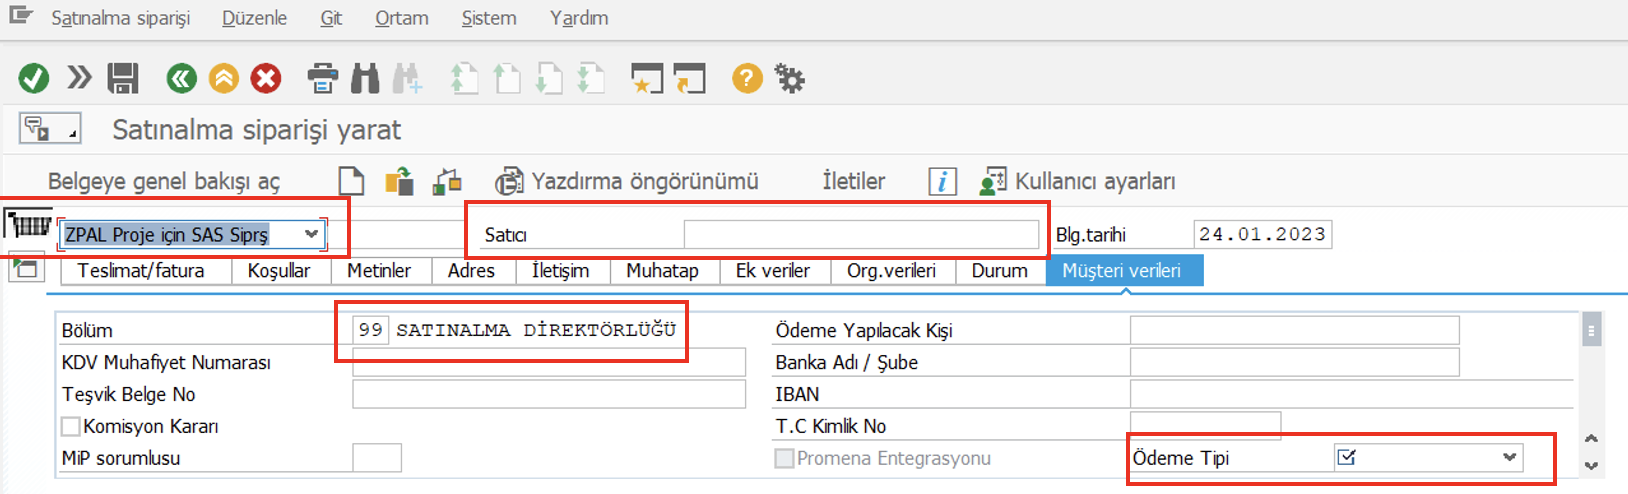
In the header data:
Document type:
-
ZMSR: Department Spending
-
ZPAL: Project Procurement
-
ZSOZ: Contract Purchases
Suplier: Entry of the person to be paid or the supplier's currentÖdeme Tipi:
-
Cash Payment: payable
-
Corporate Credit Card
-
Advance Closing
Section:
-
The code of the department you will be purchasing: 01 Faculty of Medicine, 02 Faculty of Social Units, etc.
In item data;
-
Short Text: A brief description of the purchase you will receive.
-
SAS Quantity: Quantity information of the purchase you will make.
-
SAS Unit of Measure: It is generally ADT and varies according to the type of product to be purchased.
-
Delivery Date: Must be the budget year (must be compatible with the ITP year).
-
Net Price: VAT Excluding.
-
Goods Group: Must be compatible with the goods group in the ITP.
-
Requester: It should be written on whose behalf you made the purchase.

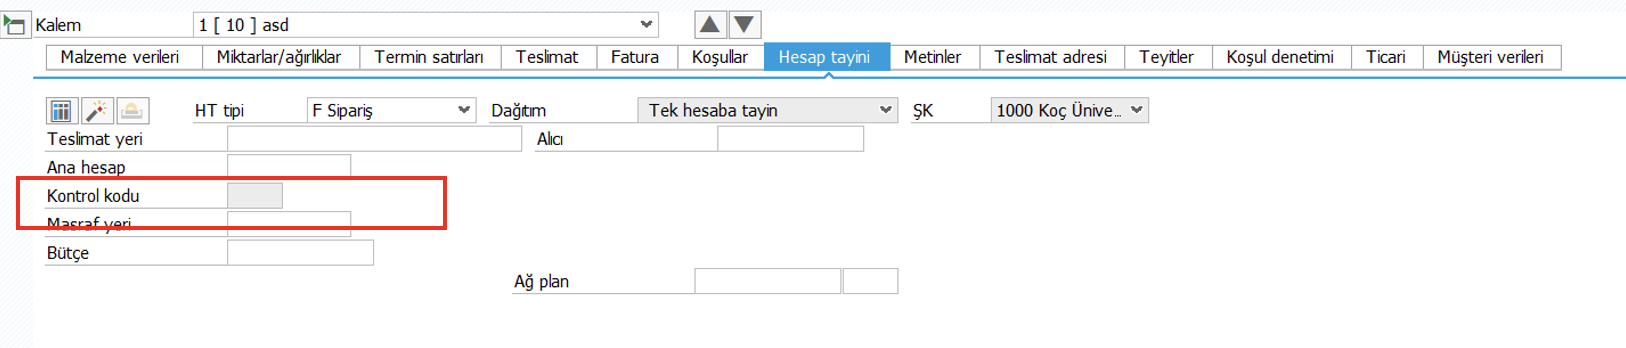
In Item Detail Data:
In the Customer Data Tab:
ITP Code; 6-digit ITP code (Excluding Projects)

In Account Assignment Tab
If ZPAL document type: PYP element (Project budget code) must be written.

If ZMSR and ZSOZ document type: Administrative Budget code must be written.
In the Invoice Tab;
In Tax Indicator: V0 to be written

In the Texts Tab;
More detailed description of the product

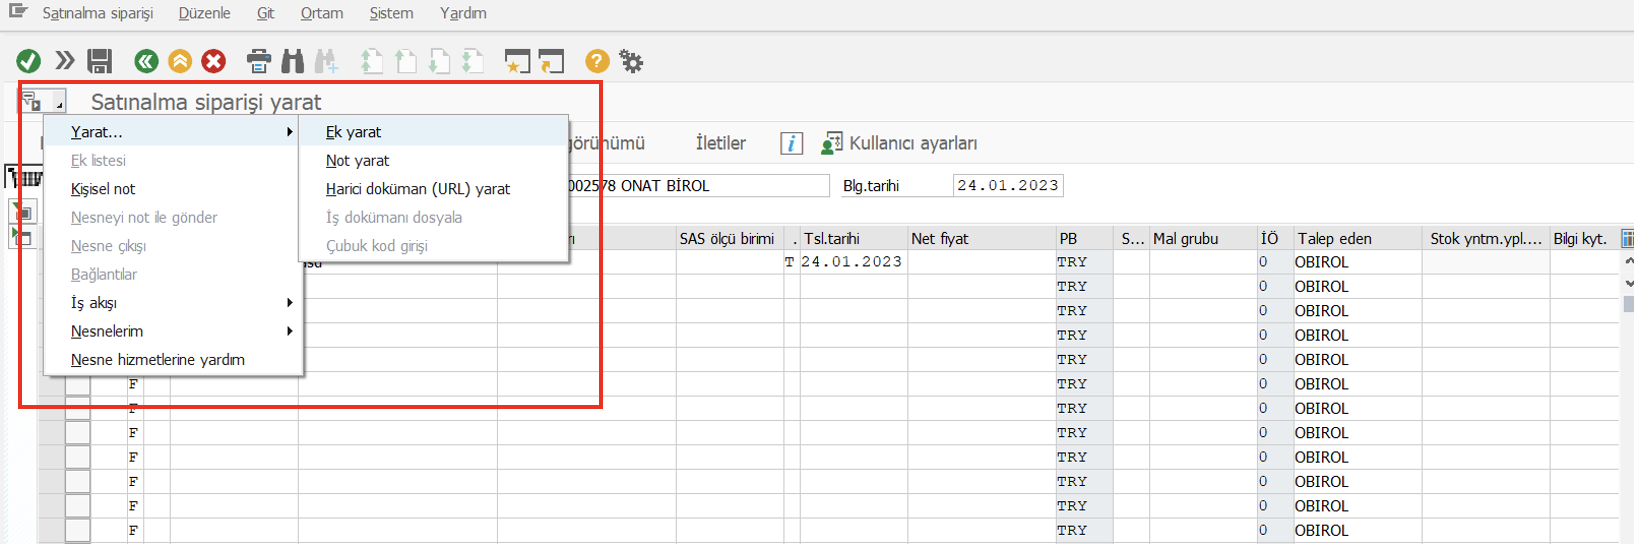
Uploading required documents for Delivery to Financial Affairs;
Click the button at the top of the order document and upload the scanned invoice and related documents on your computer in the Create Attachment field.
3. Fiori Web Confirmation Screen
Fiori Web Approval Screen is the SAP approval interface that enables approval from all platforms such as mobile phones, tablets, and PCs without the need for an SAP program.
You can access the system with the Fiori Web Confirmation Screen link. You can use your KU NetID and password to log in to the system. If you are providing internet access over a network outside the University, you must establish a VPN connection through the link https://vpn.ku.edu.tr. Click the link for assistance in creating a VPN connection.
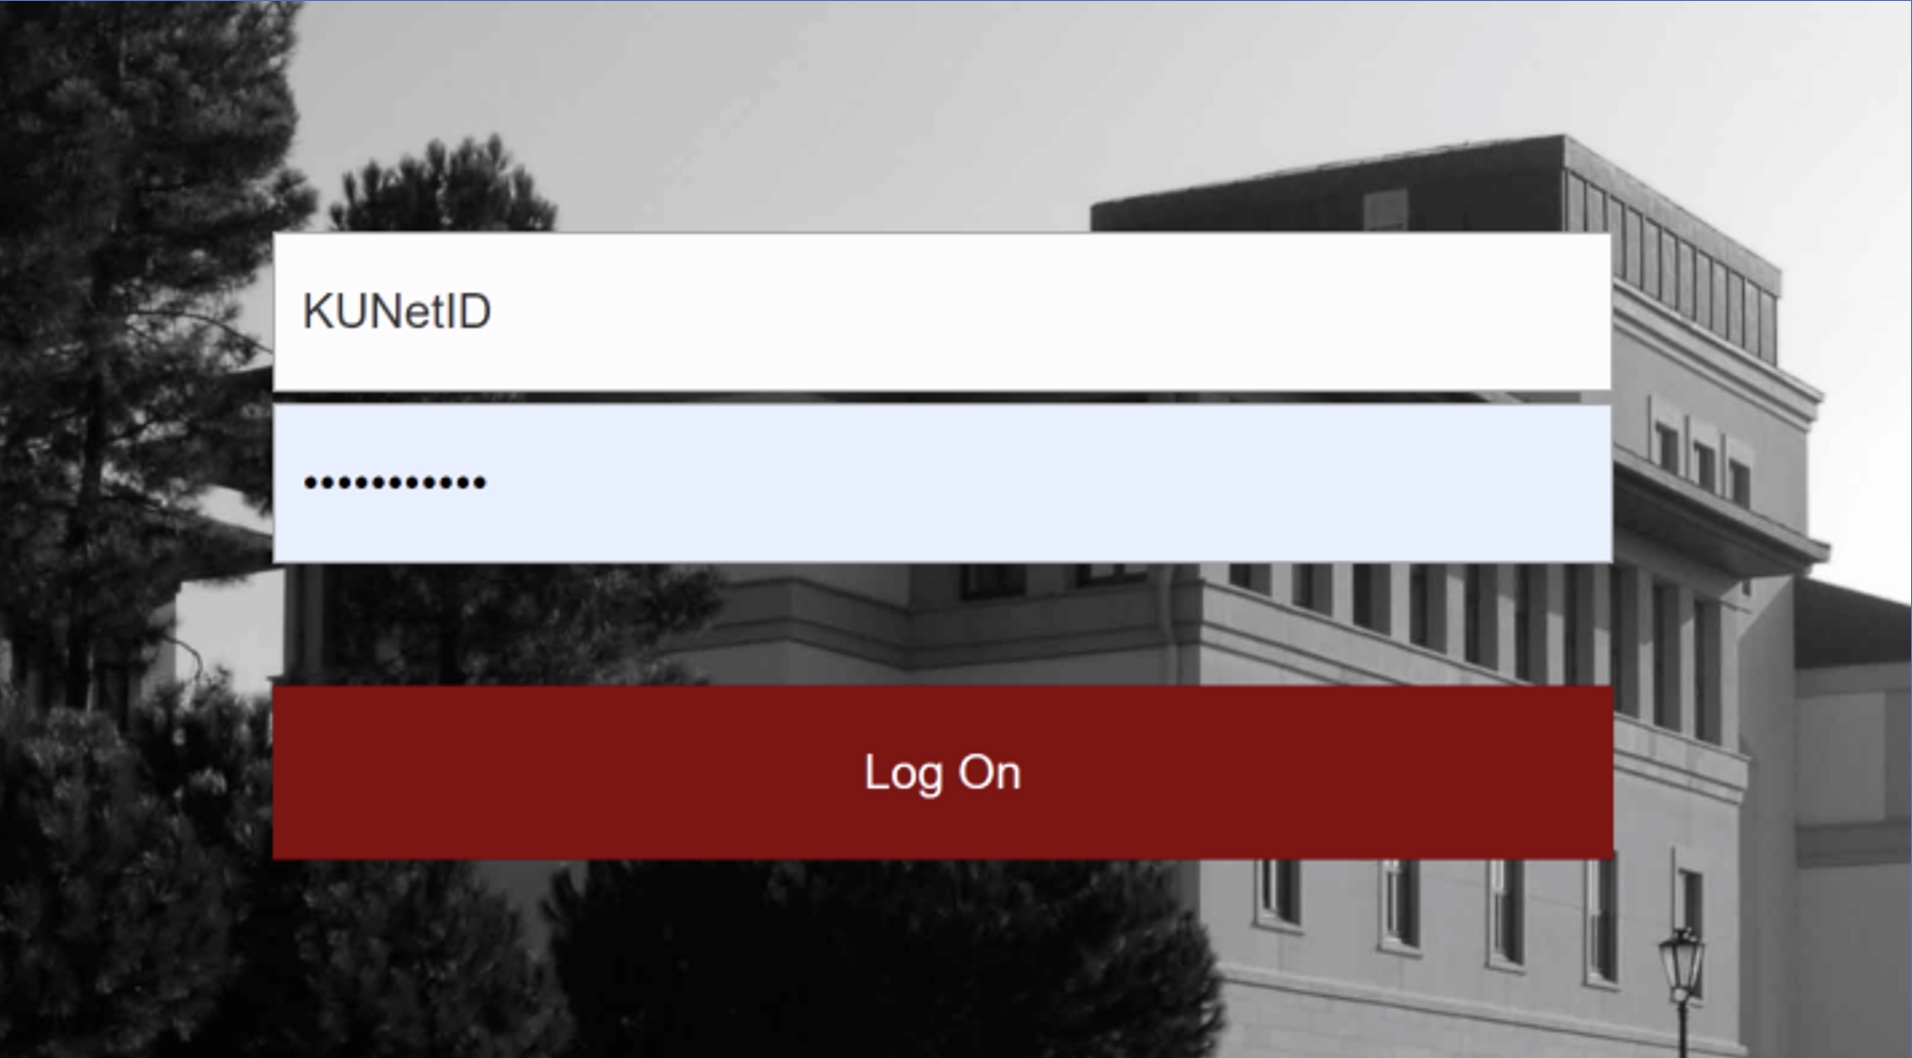
When you log in to the confirmation screen, you will see the following screen.

3.1. SAS Confirmation Screen
3.2. SAT Confirmation Screen
4. Contact information
-
General Subjects
-
Tayfun Yüzük
-
Office Phone: 0 212 338 1467
-
Mobile Phone: 0 549 562 7016
-
-
-
Buying processes
-
Onat Birol
-
Office Phone: 0 212 338 1297
-
Mobile Phone: 0 549 808 0397
-
E-Mail: scaliskan@ku.edu.tr
-
-
-
Financial Transactions
-
Okan Meydan
-
Office Phone: 0 212 338 1564
-
Mobile Phone: 0 549 778 6587
-
E-Mail: omeydan@ku.edu.tr
-
-
-
Authorizations/BASIS
-
IT Service Desk
-
Office Phone: 0 212 338 1111
-
Ext: 1111
-
E-Mail: it@ku.edu.tr
-
-
-
Human Resources
-
Office Phone: 0 212 338 1075
-
-
Academic Projects
-
Meltem Isanlar (European Union Cooperation, Capacity, Ideas, ministry fund)
-
Office Phone: 0 212 338 1293
-
Mobile Phone: 0 549 562 6937
-
-