Before the Class
If you use your personal computer in the class, install the AVer Camera Preset Tool.
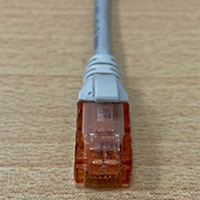
You may need a converter if you plan to use the internet cable. For a more stable internet connection, please use the ethernet cable.
|
|
|
|
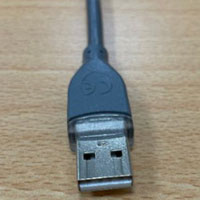
You will need a converter if your computer has a USB Type C port.
|
|
In the Classroom
Turn the projector on from the control panel.

Room Camera and Mics
Plug the Camera cable into your device’s USB port. If your computer has a USB Type C, you will need a converter. Please do NOT use a multiport adaptor for the room camera.
|
|
|
|
Room Display
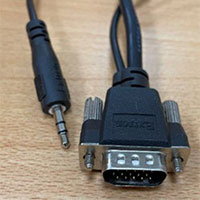
Plug one of the Display cables into your device’s corresponding video/audio port.
|
|
|
|
|
|
|
|
|
You will need a converter if your computer has a USB Type C port. |


Start the Zoom Meeting
Launch the Zoom App from Blackboard
-
Go to your Blackboard course page
-
Click Zoom Live Meeting
-
Click Start to launch the Zoom app and start the session
-
After you start the session, your session will be recorded automatically.
In Zoom App
-
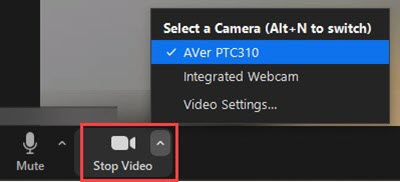
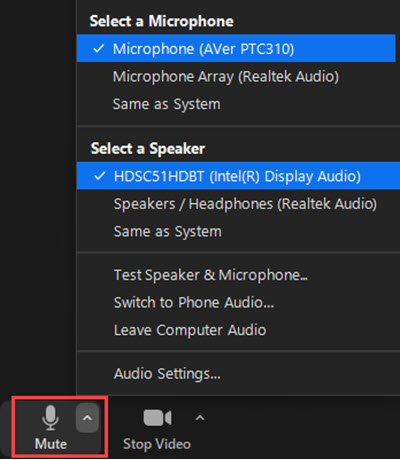
Choose the classroom camera (AVer PTC310) as the audio and video source
-
Choose HDSC51HDBT for speaker
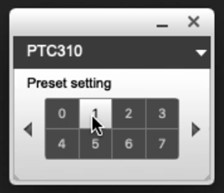
Change the camera preset using AVer Camera Preset Tool.
-
Preset 1: The chair and the whiteboard.
-
Preset 2: Only the main whiteboard.
-
Preset 3: A wide-angle whiteboard.
-
(To see how the presets look like, click here.)
During the recording, you can change the preset whenever you need.
Share in Zoom
-
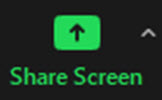
Click Share Screen and share your content
Related Content