How to Add Voice Overs Your Course Slides in PowerPoint
MS PowerPoint allows users to add voice overs to slides. Please follow the steps below.
- Open up your slides.
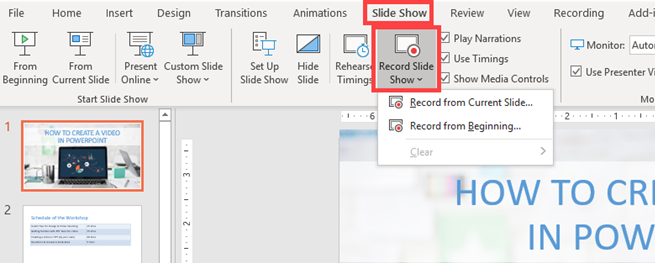
- Click the Slide Show tab, and then select the Record Slide Show option which gives you the option to start from the beginning or from the current slide.

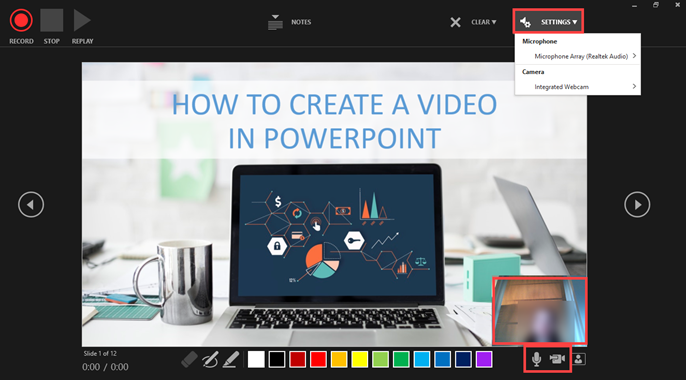
- The slide show opens in the Recording window, with buttons at the top left for starting, pausing, and stopping the recording. Click the round, red button when you are ready to start the recording. A three-second countdown ensues, and then the recording begins.
Navigation arrows on either side of the current slide allow you to move to the previous and next slides.
You can record audio or video narration as you run through your presentation. The buttons at the lower-right corner of the window allow you to toggle the microphone, camera, and camera preview on or off:

If you use the pen, highlighter, or eraser, PowerPoint records those actions for playback also.

If you re-record your narration (including audio and ink), PowerPoint erases your previously recorded narration (including audio and ink) before you start recording again on the same slide.
To end your recording, select the square Stop button.

- When you finish recording your narration, a small picture appears in the lower-right corner of the recorded slides. The picture is an audio icon, or, if the web camera was on during the recording, a still image from the webcam.

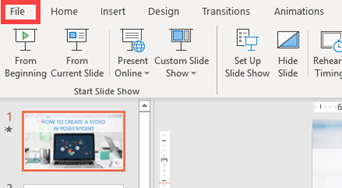
- If you are satisfied with your recording, you can export your slides as video. Click the File

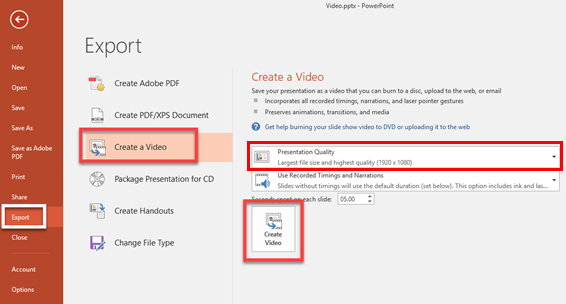
- Click Export, then select 'Create a Video'. It may take time depending on your video size.
If the video size is too large, you can change Presentation Quality to reduce it.

