
You can also access your account with the “Microsoft Authenticator” application that you download to your phone instead of receiving an SMS code. With this method, independent of GSM service providers, you can access your account through your internet connection, with the code or notification you receive from the application.
You can verify your identity with your mobile device by receiving a notification or by entering an automatically generated authentication code.
You can update or change your MFA authentication methods at any time using the https://aka.ms/mfasetup link.
Verification Methods for MFA
You need to define two verification methods for MFA:
-
Approving the notifications sent to the Authenticator application you install on your device.
-
Verifying with the SMS or call sent to your GSM number.
Prerequisites Before MFA Setup
-
Your Koç University email address (e.g., user@ku.edu.tr) and password
-
A mobile phone (Android or iOS)
-
A device lock (PIN, fingerprint, or Face ID) must be configured on your mobile device
-
A computer or second device (recommended for QR code scanning)
-
Microsoft Authenticator app installed on your phone
-
Internet access on both mobile and computer
-
Authenticator permissions enabled (notifications, camera, background activity)
-
A working camera to scan the QR code
Step 1: Download and Install the Microsoft Authenticator Application
-
Search for and download the “Microsoft Authenticator” application from the App Store or Play Store on your mobile device.
Google Play: https://play.google.com/store/apps/details?id=com.azure.authenticator
App Store: https://apps.apple.com/us/app/microsoft-authenticator/id983156458
Please do not approve access notifications without your knowledge.
Step 2 : Authenticator Application Notification Settings
-
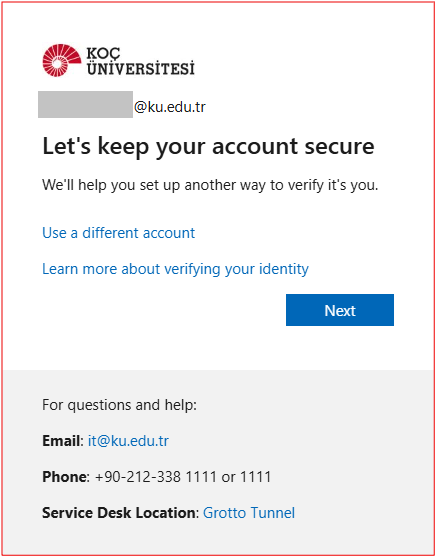
After downloading the Microsoft Authenticator application to your mobile device, go to https://aka.ms/mfasetup . On the screen that appears, continue with the Next button.
-
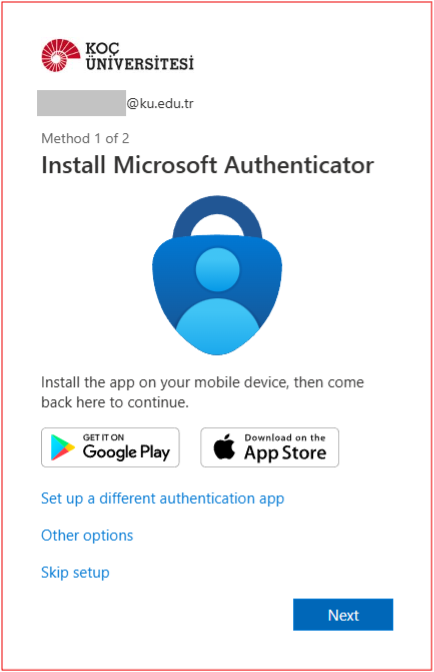
On the “Set up Microsoft Authenticator” screen that appears, continue with the Next button.
-
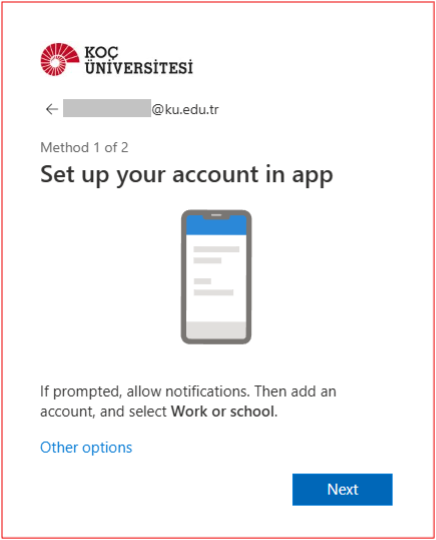
Before continuing, make sure the Microsoft Authenticator application is installed on your mobile device. Continue with the Next button.
-
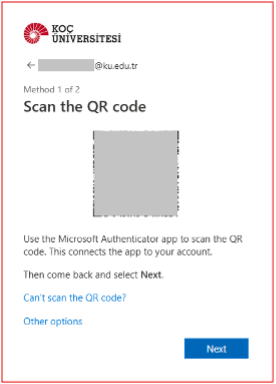
A QR code will appear for you to configure your account settings. Keep this screen open on your computer and open the Authenticator application installed on your mobile device.
Step 3: Set up the Microsoft Authenticator Application
-
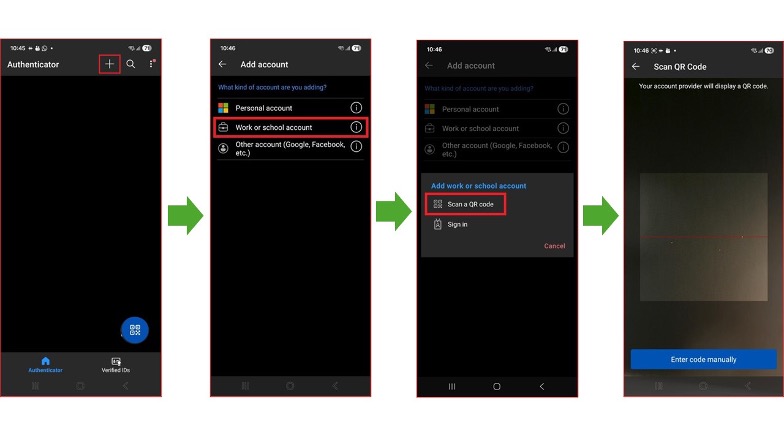
Open the Microsoft Authenticator application installed on your mobile device. As shown below, tap the “+” button in the top right corner.
-
From the account type list that appears, select “Work or school account”.
-
In the menu that appears, continue with the “Scan a QR code” option.
-
Scan the QR code displayed on your computer using the camera screen of the Microsoft Authenticator application.
If you have a problem while reading the QR code, you can click the "Can’t scan the QR Code" field and enter the code in the "Code: XXX XXX XXX" field under the QR code section on the computer screen.
-
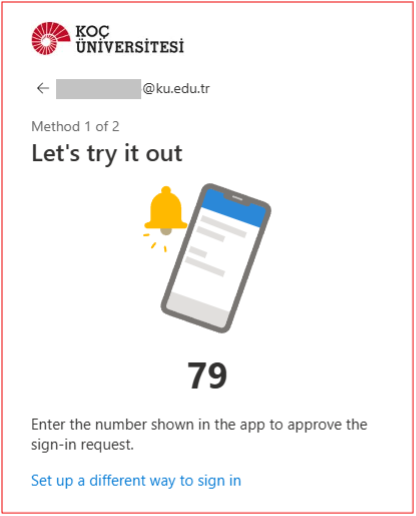
Once you successfully scan the QR code, a notification will be sent to your phone. Enter the code shown on your computer screen into the Authenticator application to approve it, activate the application, and move on to the 2nd verification method.
Step 4: MFA 2nd Verification Method – GSM Number
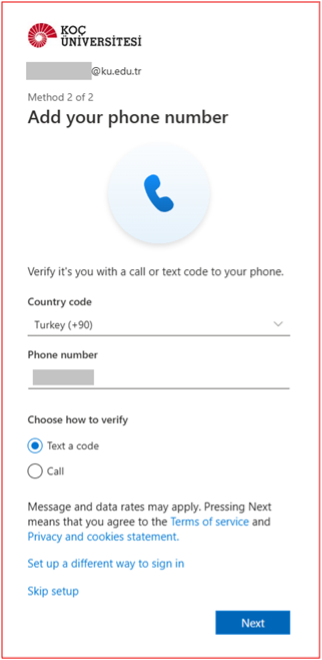
If the Authenticator application does not work, you can also access your account with the SMS or call notifications sent to your GSM number. If you have completed the Authenticator settings successfully, the system will automatically direct you to the 2nd verification step below.
Select your country code and enter your phone number without the leading zero, then choose either the “Text a code” (SMS) or “Call” option according to your preference.
-
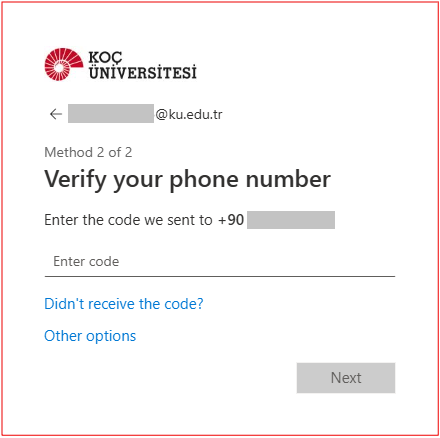
Enter the SMS code sent to your mobile device into the relevant field.
If you selected “Call” in the previous step, you will receive a phone call instead of a code.
-
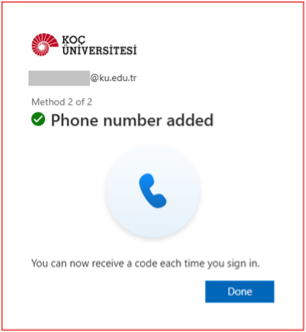
After successfully completing the GSM line verification, your phone number will be added to your account as shown below.
Step 5: Using the Microsoft Authenticator Application
-
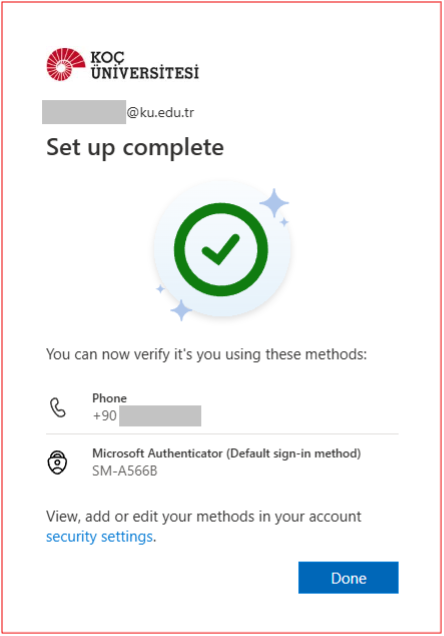
Once you have completed both verification methods, your setup will be finished successfully, as shown below.
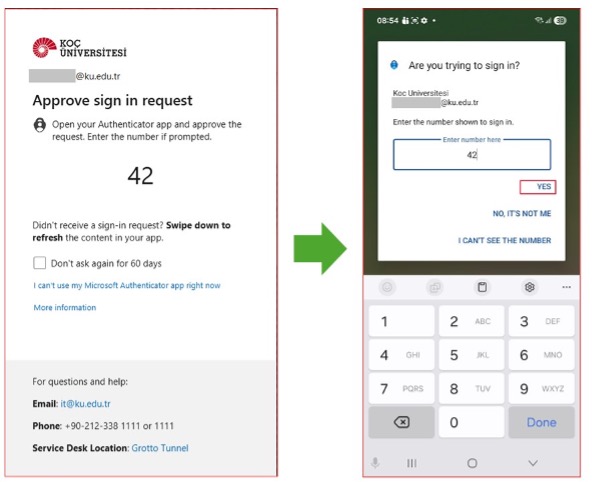
After completing the Authenticator application settings, you can sign in to your KU NetID account by approving the notifications sent to your mobile device instead of SMS whenever you want to access your account.
You can update or change your MFA authentication methods at any time using the https://aka.ms/mfasetup link.